Cut Backsplash Off Laminate Countertop
A laminate backsplash should go with a laminate countertop; your backsplash can be a few inches to a few feet tall. The backsplash is often cut before installation, and the laminate piece usually rests on sawhorses before cutting.
If the laminate is already fixed, you can still cut it down, but the wall texture behind the laminate will likely need to be refinished afterward. Most of this happens if you want a tile backsplash, and you are changing from your laminate counter to a granite counter top, and you need to remove the integrated backsplash.
The key to this project is removing the laminate counter and how to cut off a laminate-formed backsplash without damaging your cabinets. In our post, you can learn how to remove the old trim and thus replace your new splash back without damaging your counter tops or cabinets.

By the end, you’ll have a better understanding of how to clear the space and install your new tile backsplash that is flush in every trim area it needs to be. (Learn How Long Do Roses Last In The Fridge)
Cut Laminate Kitchen Counter To Fit Tile Back Splash
Here’s what you need to cut your counter edge to make space for your tile backsplash.
What you need:
- Preformed laminate countertop
- 2 sawhorses
- Pencil or marker
- Masking tape
- Work gloves
- Heat gun
- Safety goggles
- Jigsaw with a fine-tooth blade
- Medium grit sandpaper
- Construction adhesive
- Router
- Laminate roller
Preformed laminate countertops have an upward rising ridge along the back edge and act as a premade backsplash for your wall. If you want to replace it with a ceramic backsplash, it will sit at the surface level of the kitchen countertop. Now, you’ll have to make room.
Cutting isn’t a complicated process and, luckily, doesn’t need too much experience. After removal, you can place your installed ceramic backsplash nearly flush with the countertop apart from the thin joint of the sealing compound. (Read Can A Propane Tank Lay On Its Side)
Directions:
- The laminate countertop should be securely supported by a pair of sawhorses spaced far enough apart on a flat surface.
- Set the countertop across the sawhorses with the attached backsplash facing you and the rear of the counter facing up.
- On the surface of the attached backsplash, draw a cutting line at the rear of the countertop with a marker.
- Place the line, so it is level with the countertop surface and goes straight across the length of the counter.
- To avoid shortening the countertop, make your cut to remove the upturned area of the backsplash and not the base.
- Over the cutting line, place a strip of masking tape extending the countertop’s length.
- The countertop should now be facing upright.
- Wear your work gloves.
- Set the heat gun to low. The adhesive binding the laminate to the counter core will get weaker because of heat when the heat gun is passed over the backsplash of the counter.
- To uniformly heat the countertop, move the heat source back and forth over the surface.
- Pull the heated laminate covering away from the backsplash’s central part until you are an inch from the countertop’s flat, laminated surface and the base of the laminate backsplash.
- Switch off the heat source. To reach the base, flip the countertop over once more.
- Wear safety glasses while cutting the countertop.
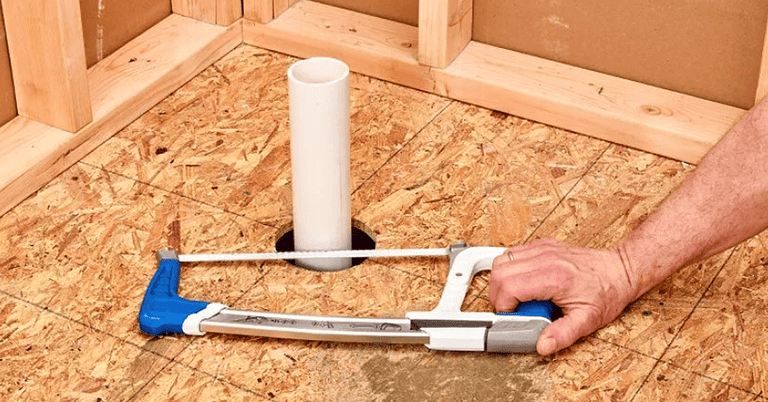
- Use a jigsaw with a fine-tooth blade to cut through the countertop following the marked cutting line.
- Cut flush with the saw and cut along the rear of the counter; remove the backsplash part that was turned up while leaving the laminate that covered it intact.
- Remove the masking tape.
- The countertop should now be facing up.
- Sand the counter’s cut surface until it is even with the uncut surface that you exposed with the inch-long strip of laminate removed.
- To smooth the surface while leaving some texture for the adhesive, use medium-grit sandpaper. Use a tack cloth to clean.
- Put a layer of construction adhesive on the countertop surface and the laminate that isn’t attached.
- After application, watch for the adhesive to lose its moist appearance. Onto the countertop, press the laminate.
- To remove any air that has been trapped behind the strip, smooth the laminate with a laminate roller.
- With a router, cut the laminate flush to the back edge from the back of the countertop.
- Without the laminate backsplash interfering with the installation, you can install the cut countertop and then place the ceramic backsplash as usual.
Cut Off Laminate Formed Backsplash

On the laminate backsplash, use a pen to mark the area you wish to create a straight edge to cut.
To make a clean cut line, extend a measuring tape.
Over the indicated line where you will cut, place a piece of masking tape.
On top of that, place a further layer of masking tape. You can avoid damaging the laminate while cutting by marking your measurement with tape.
Since the masking tape obscures the initial mark, make another cut line with your pen over the tape. If required, retake the backsplash measurement.
The backsplash’s depth should be measured.
The circular saw depth should be 1/8 inch deeper than the thickest area of the countertop.
Activate the circular saw and let the blade reach its maximum speed.
The circular saw’s blade should be aligned with the mark as you place it flat on the surface. Using the saw, cut the backsplash following the measurement mark.
After finishing the cut, sand the backsplash’s cut edge with 220-grit sandpaper.
Be sure not to damage or pull up the laminate. Sand downward without damaging the edges. (Read Toro Recycler Vs Super Recycler)
How to Remove Laminate Countertop
Before tugging on any water or gas lines in the kitchen to remove countertops, it’s a good idea to turn them off.
- Open your cabinets and remove the drawers.
- Even if you don’t need to remove and open them all, doing so makes it simpler to remove the countertop and have unobstructed access.
- Since they are bolted in place, removing the actual countertops is easy. Plastic diagonal pieces are in each corner, which you can see if you look inside the cabinet up at the underside of the counter.
- The countertop material is joined to the cabinets by these pieces of plastic.
- A few screws only secure the countertops.
- After removing the screws holding the counter with a drill, the countertops will lift off.
- To prevent harm, lift the countertop with a companion.
- Kitchen countertops made of solid surface and laminate can be used with this technology.
- Before gently removing stone counters, remove the caulk and glue using a putty knife.
How To Remove Glued-Down Laminate Countertops?
Some countertops are glued down, though not all of them. If yours have glue, you can simply score or cut right along the glue to free it up with your utility knife.
You might need to use a little extra strength to pry the countertops up. You can also purchase a caulk softener to make it simpler to cut the caulk.
How to Remove a Laminate “Backsplash”
- After removing the screws with a drill, the countertops should lift off.
- Place a pry bar or straight-edge removal tool between the laminate backsplash and the wood.
- Tap the back with a hammer to remove the laminate from the wood. Unscrew the board from the wall and remove the laminate covering.
FAQs
Is it hard to remove laminate countertops?
Laminate countertops are simple to remove! Removing it yourself saves money for installing your new countertop!
Do I Need a Professional for Countertop Removal?
NO! DIY this. All countertop installers remove old countertops. Lightweight laminate is easy to remove, unlike heavy granite.


