Backyard Vegetable Gardening: Planning for Success
You can turn a sunny patch into a tasty, low-stress veggie garden by picking a sunny spot, testing and amending soil, and planning beds so you don’t step on roots; choose veggies by season and space (trellis beans, start tomatoes after frost), water with drip or deep soaks, mulch to save time, rotate families, and scout for pests—do a little every week and you’ll get more food with less fuss, and keep going to learn tricks that increase yield.
TLDR
- Choose a sunny, well-drained site with at least 6–8 hours of direct sun and nearby water access.
- Start with raised beds 2–3 feet wide, good paths, and trellises on the north side to maximize access and light.
- Test soil pH/nutrients, loosen 8–12 inches, and amend annually with compost or rotted manure.
- Plan crops by season, rotate families every 2–3 years, and use succession planting for continuous harvests.
- Install drip irrigation, mulch 2–3 inches, and monitor moisture to conserve water and reduce disease.
Assessing Your Garden Goals and Needs
Because planning a garden is a bit like packing for a camping trip—you want the right gear, enough snacks, and a route that doesn’t leave you stuck in the mud—you should start by thinking about what you really want from your backyard vegetable patch.
Decide veggies you love, include a few perennials, estimate space and time, plan rotation, and pick trellises, paths, compost and watering that match your goals. Choose a spot that gets 6 to 8 hours of sunlight daily for most vegetables. Consider regular feeding with a balanced fertilizer to support growth and yield, especially for containers and heavy-feeding crops like tomatoes balanced N-P-K.
Choosing the Right Location and Soil Preparation
Pick a sunny spot you actually like to walk past every day, because most veggies want at least six hours of direct sun (ideally eight to ten), and choosing south or east exposures can make a huge difference—trust me, I once planted tomatoes in a shady nook and they sulked all summer. Test your soil for pH and nutrients so you know whether to add compost, lime, or a bit of balanced fertilizer, and remember that sandy dirt needs organic matter while clay needs help with drainage, which is where raised beds or coarse amendments come in. Consider placing tender perennials in a warmer microclimate to improve winter survival. And don’t forget to plan for water access and drainage—set up drip lines or a rain barrel, keep puddles away from roots, and enjoy the little victory dance when your first seedlings perk up. Add compost and organic matter annually to improve soil structure and fertility for healthier plants, which is especially important in annual vegetable beds compost and organic matter.
Sunlight and Exposure
If you want your veggies to be happy and productive, start by finding the sunniest spot in your yard—think of it like choosing the best campsite where the morning and afternoon light are your cozy campfire and clear sky, and try to get at least six hours of direct sun for most crops, with the strongest, most useful light coming between about 10 a.m. and 4 p.m.
Choose south-facing, avoid shade, map sunlight, use raised beds, add organic matter, mulch to keep soil warm and moist, and pick shade-tolerant greens if light’s limited.
Soil Testing Basics
You’ll usually want to treat soil testing like scouting a campsite before you pitch your tent—walk the whole area, look for the flattest, sunniest spots, and don’t just grab one quick handful from the first patch you step on; instead, take several samples from the top 6 to 8 inches where your vegetable roots will actually live, mix them together in a clean container, and dry any muddy clumps so the lab gets a true image of your garden’s soil.
Then remove debris, avoid weird spots, do a ribbon test to feel sand, silt, or clay, bag the composite per lab rules, and send it off—exciting, right?
Amendments and Drainage
Now that you’ve gathered a real snapshot of what’s in your soil, it’s time to pick where you’ll set up camp for your veggies and get the ground ready like a comfy campsite pad—sunny, well-drained, and easy to get to.
Amend with compost or rotted manure, loosen to 8–12 inches, build raised beds if clay or puddles, divert runoff, mulch, and enjoy healthier roots.
Designing Efficient Garden Layouts and Beds
When you’re planning your garden layout, think of it like packing for a great camping trip—bring only what fits, stack things smartly, and leave clear trails so you don’t trip over your own tent pegs; raised beds that are 2 to 3 feet wide are like perfectly sized sleeping bags, letting you reach the center from either side without stomping the soil, while long, narrow beds can slip neatly along fences or walls and squeeze more growing space into odd corners.
Use paths, edging, vertical trellises on the north side, dense blocks instead of rows, and rotate crops each few years; I swear it makes tending easier and yields better. Consider adding low-maintenance evergreen groundcovers around beds to suppress weeds and provide year-round color.
Selecting Vegetables by Climate and Season
Ever wonder why some gardens burst with tomatoes while others only manage a sad row of lettuce? You’ll pick veggies by zone, frost dates, and microclimates, planning cool-season greens for early spring or fall, and warm-season peppers and tomatoes after last frost.
Adjust for elevation, drought or short seasons, start seeds indoors if needed, and enjoy experimenting — I love that camping-like thrill of timing! Planting native species like Swamp Milkweed can support local ecosystems and pollinators.
Determining How Much to Plant Per Person
Figuring out how much to plant per person is part math, part guesswork, and part glorious trial-and-error camping thrill — you’ll feel like you’re mapping a food voyage in your backyard — so start by imagining what you actually eat and how you want to store food, then translate that into plants; for instance, plan 15–20 potatoes, 5–15 tomatoes, 15–20 bush beans, 10–15 pole beans, 20–30 peas, about 24 lettuce, and adjust up if you’re preserving.
Planning Succession, Interplanting, and Vertical Growing
If you treat your garden like a mini camping expedition, with routes, pit stops, and surprise detours, you’ll get why succession, interplanting, and vertical growing are your secret trail maps — they let you squeeze way more food out of the same plot by timing, pairing, and stacking plants so nothing sits idle.
Stagger sowings, tuck fast greens beside slow brassicas, climb beans up trellises, and swap beds swiftly for nonstop harvests.
Irrigation, Mulching, and Soil Moisture Management
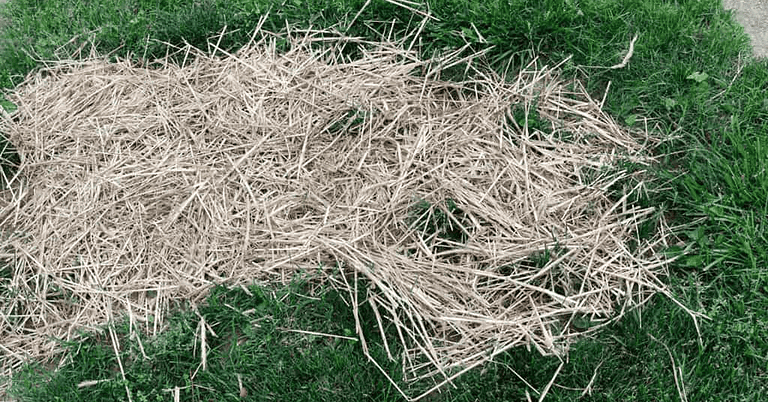
Ready to make your garden feel like a comfy campsite where plants can sip water just right? Try efficient drip irrigation or soaker hoses that put water straight at the roots so you’re not wasting gallons, pick organic mulches like straw or composted wood chips to hold moisture and feed the soil (I love how straw smells after a rainy night), and keep an eye on soil moisture with a simple probe or even your finger to water only when the soil feels like a slightly damp brownie, not a soggy pancake.
Remember: set things up smart, check regularly, and you’ll spend less time hauling hoses and more time enjoying the outdoors—maybe even camping out near your tomatoes for the sunset.
Efficient Drip Irrigation
You’ll quickly love how drip irrigation turns a thirsty garden into a calm, efficient oasis, because it waters right at the roots, wastes almost no water, and makes your life way easier—seriously, I switched mine years ago and never looked back.
It saves 30–50% water, keeps leaves dry to cut disease, limits weeds, needs careful layout and occasional maintenance, and works great with timers.
Organic Mulch Choices
Now that your drip system has your beds sipping water like campers around a slow-burning stove, let’s talk about what to lay on top of the soil to keep that moisture where it belongs: organic mulch.
Use compost, straw, leaves, grass clippings, or wood chips, apply 2–3 inches, keep mulch off stems, fluff yearly, and pick local, clean materials to enhance moisture, microbes, and soil health.
Monitoring Soil Moisture
Often you’ll want to think of soil moisture like the fuel gauge on a road trip — except instead of stopping for gas, you’re topping up with water so your veggies don’t sputter, and yes, it’s way less stressful than being stranded on a dusty highway.
Use a probe or TDR for accuracy, tensiometers or feel for quick checks, mulch to save moisture, and automate if you love gadgets.
Pest, Disease, and Crop Rotation Strategies
When you treat your garden like a tiny, well-organized campsite—setting up barriers, rotating tents (aka crops), and keeping the area tidy—you’ll have fewer surprise “campfire” visitors like aphids or beetles to ruin the fun; I’ve learned this the hard way after once finding a whole row of baby beans turned into an aphid buffet overnight, so trust me, a little planning goes a long way.
Use row covers, rotate families every 2–3 years, encourage beneficials with flowers, handpick pests, wash plants, prune damaged leaves, yellow sticky cards help monitor, and bury debris to stop overwintering bugs.
Harvesting, Preserving, and Extending Your Harvest
Savoring the fruits (and veggies) of your labor feels a bit like unrolling your sleeping bag at the perfect campsite—relief, satisfaction, and a little bit of magic—and harvesting right makes all the difference, so you’ll want to learn how and when to pick each crop to keep flavor, texture, and production at their peak.
Harvest early, cut with sharp tools, cure garlic, fridge cucumbers, succession-sow for nonstop bounty.
Overall
You’ve got a plan now, so get out there and start digging—seriously, your future salad will thank you, and you’ll brag about crunchy carrots on your next camping trip; isn’t that worth a little dirt under your nails? Try a few beds, note what worked, rotate crops, and water wisely, and if bugs show up, outsmart them with traps or quick swaps. Have fun, experiment, and enjoy fresh food straight from your own backyard.