Best LED Grow Lights for Indoor Plants
You’ll want full‑spectrum quantum boards or high‑PPE fixtures with Samsung/Osram diodes, because they give lots of usable light (PPF) per watt and won’t roast your power bill; for seedlings grab low‑heat LED bars, for hobby tents HLG‑style boards, and for CO2 rooms choose high‑output commercial fixtures with dimming and verified PPF. I’ve used quantum boards—super even coverage and easy mounting—so pick verified specs, good heatsinks, and modular control, and keep going to see specific models and tips.
TLDR
- Choose fixtures with high PPE (µmol/J) and verified PPF to maximize usable light per watt and control operating costs.
- Prefer quantum boards or full-spectrum fixtures using Samsung/Osram diodes for even canopy coverage and high output.
- Match light intensity and hang height to area: target ~20–30 W/ft² or PPFD goals, adjust height during vegetative vs flowering stages.
- Use spectrum-tunable or multi-channel LEDs to optimize blue-heavy for seedlings and red/far-red-rich spectra for flowering.
- For CO2-enriched or commercial rooms, select high-PPF fixtures (PPE >2.5 µmol/J) with robust cooling and modular dimming.
How LED Grow Lights Work and Why They Matter
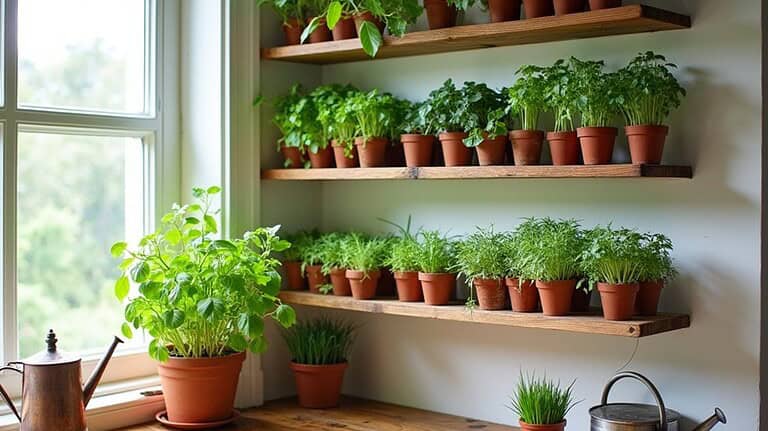
Because plants can’t just wander outside to chase the sun, we use LED grow lights to give them the exact light they need indoors, and honestly, once you see how precise they’re you’ll be a little impressed — I was the first time I set up a tiny herb shelf and watched basil explode overnight.
You’ll learn LEDs emit targeted PAR wavelengths, save energy, run cool, and last ages, so your indoor garden thrives without frying or wasting power. LEDs also allow growers to tailor the light spectrum and intensity to each growth stage using spectrum control. Red to blue light ratios play a big role in how plants grow, influencing size, stem strength, and flowering.
Choosing the Right Spectrum for Each Growth Stage
When you start seedlings, keep the lights gentle and a bit blue-heavy—think of it like tucking them into a cozy camp tent where blue light helps stems stay stocky and leaves unfurl without getting burned, so keep the fixtures a little farther away and run them about 14–18 hours. Remember that blue light is especially important because it is efficiently absorbed by chlorophyll and drives the light-dependent reactions of photosynthesis. Ready to switch gears later? Gradually nudge the light range toward stronger red as plants move into flowering, because red wavelengths act like a sunset cue that tells plants to make flowers and fruit, and that shift, if you time it right, can feel as satisfying as catching the perfect sunrise on a camping trip. Trust me, I’ve watched tiny sprouts turn into buzzing blossoms under the right mix, so play with the blue-to-red balance and you’ll see big changes—just don’t blast seedlings with full-on red or UV too soon, they’ll sulk. Test your soil pH regularly to make sure nutrient availability matches plant needs, especially as growth stage and light spectrum change soil pH.
Seedling: Gentle Blue-Red Balance
I usually get a little excited talking about seedlings, because they’re like tiny travelers setting out on a big trek and they really need the right kind of light to get a strong start; think of blue light as the gentle trail guide that keeps them compact and sturdy, and red light as the comfy fuel stop that helps them build energy without stretching into lanky, sun-starved shapes.
Use about 14% blue, 43% red, add some green for canopy penetration, keep lights 10–14 inches up, and choose presets so seedlings grow bushy, with strong roots, not spindly — trust me, it feels like camping with tiny, leafy adventurers.
Flowering: Stronger Red Emphasis
You loved giving those seedlings a cozy, blue-lit campsite, and now it’s time to pack up the mini tents and move toward the big, red bonfire of flowering—picture autumn sunlight and a busy buffet that tells plants it’s showtime.
Shift to red-heavy (620–730nm) with some far-red, keep a little blue, dim or tune as buds fatten, and enjoy bigger blooms, less heat, and lower power bills.
Top Full-Spectrum Quantum Board Options
You’re going to love how full-spectrum quantum boards cover and penetrate a plant canopy, spreading light evenly across wide areas so your seedlings don’t end up squabbling for photons like campers fighting for the best sleeping spot.
Want efficiency that actually matters? Look for boards using Samsung or Osram diodes that deliver high μmol/j and strong PPF so you get deep canopy penetration and the right mix of blue for leafy growth and red for big flowers, all while saving energy.
Try one yourself, hang it at the recommended height for your wattage, and you’ll see how much more uniform and productive your indoor “campground” becomes—trust me, I was skeptical at first until my basil and peppers started reaching like they were trying to wave at the moon.
Lee Valley tools are known for their ergonomic designs, which can help when installing and adjusting lighting rigs.
Coverage and Penetration
Because quantum boards lay their LEDs flat and tight, they throw a big, focused beam straight down into your plants, so you’ll get a powerhouse of light right in the middle of the canopy where it counts most—think of it like shining a flashlight into the center of a forest and suddenly the understory wakes up; it’s especially handy for medium-to-tall specimens that need deep penetration to reach lower leaves.
Quantum boards give dense, centered PAR so lower leaves get light, you’ll see fewer shaded spots, and with multiple panels you can expand coverage without losing punch—kind of like camping with a headlamp and lantern together, brilliant!
Spectrum and Efficiency
While camping under a sky full of stars I learned that light makes everything look alive, and full-spectrum quantum boards do the same for your plants—mixing blue, red, white, and even a touch of IR and UV so seedlings sprout strong, leaves thicken up, and flowers fatten nicely without you having to become a lighting engineer overnight.
You’ll love their even spread, low heat, high PPE, modular dimming, and Samsung LED quality—simple, efficient, and oddly satisfying, like perfect campfire glow for chlorophyll.
Budget-Friendly LED Solutions for Seedlings and Clones
If you’re setting up seedlings or clones on a tight budget, don’t panic—there are plenty of cheap, reliable LED options that’ll give your little plants a great start without zapping your wallet or turning your grow space into a sauna; I’ve cobbled together setups in cramped apartments and even a campground pantry light once, and a simple, low-heat LED bar or strip can make all the difference.
Choose Mars Hydro or Redfarm for value, consider AgroMax strips or HLG 65 V2 for dimmable, low-heat performance, or rig safe DIY 22W bulbs, spacing bars 12–24″ to avoid stretching, and watch energy bills stay low.
Regular maintenance and proper handling also extend the usable life of your lighting and equipment, so store gear in a clean, dry area and inspect it regularly.
High-Output Fixtures for Commercial and CO2-Enriched Rooms
If you’re running a commercial room or pumping CO2 into your canopy, you’ll want high-intensity PPF output that pushes photosynthesis hard—think sustained PPFD up near and above 950 µmol/m²/s so plants can gulp light like hikers after a long trail.
Want the best results? Use CO2-optimized spectra that blend blue, red, and a touch of green with adjustable ratios and timing, so you can match light to growth phase and CO2 dosing like tuning a camp stove for perfect s’mores.
Trust me, I’ve swapped out wobbling old lamps for crisp, adjustable LEDs and the difference in uniformity and vigor is like trading a leaky tent for a snug cabin—more yield, less stress, and fewer sweaty nights under heat lamps.
High-intensity PPF Output
Usually when you’re gearing up to light a commercial grow or a CO2-enriched room, you want fixtures that blast out serious photons—think PPF well over 1500 μmol/s—so your densely packed plants get the 800–1200 μmol/m²/s PPFD they crave; I’ve hung a few of these beasts myself in a cramped tent and felt like I was camping under a very bright, scientifically-tuned sun.
You’ll want PPE above 2.5 μmol/J, verified wattage, even PPFD maps, sturdy thermal design, and IP65 durability, so your setup runs efficiently, covers broad canopies at higher hang heights, and scales smoothly.
CO2-Optimized Spectra
When you crank up CO2 in a commercial grow room, you’ll want light that’s been tuned like a road trip playlist for peak performance—think strong reds and bonus far‑red for big, fast biomass, a pinch of blue to keep plants squat and stomata wide open for gulping in that extra carbon, and even some UV to sneakily enhance flavor and value—I’ve seen it turn a meh harvest into something chefs actually notice.
Use adjustable multi‑channel LEDs, match high PPF to 1000–1500 ppm CO2, and monitor spectra and intensity so plants don’t get carbon‑starved or photoinhibited, trust me, it’s rewarding.
Matching Coverage Area and Light Intensity to Your Space
Because your plants can’t tell you how much light they need, you’re the one who’s to match the light to the space—and it’s not as scary as it sounds, promise—so let’s break it down like planning a campsite: measure the tent (your grow area), figure out how many sleeping bags (plant canopy square footage) you need to cover, and then pick lights that spread evenly so nobody gets left in the cold spot;
for example, a 5′ x 5′ grow area with a 4′ x 4′ canopy usually needs roughly 320–480 watts of actual LED power to hit that comfy 20–30 watts per square foot sweet spot, but you’ll also want to think about height—closer for flowering, higher for veg—and whether several smaller fixtures might give you smoother, less hotspotty coverage than one hulking lamp (I learned that the hard way when a single bright light turned my basil into a sunburnt chip).
Energy Efficiency, PAR, and PPF: What to Compare
If you want your indoor garden to be both happy and cheap to run, start by comparing energy efficiency, PAR, and PPF like they’re camping gear you’d pack for a trip—because each one tells you something different and you don’t want dead batteries mid-hike.
Check PPF for total usable photons, PAR for useful wavelength range, and aim for high µmol/J so you get more light per watt.
Mounting, Distance, and Light Management Best Practices
Packing your grow setup like camping gear will save you headaches, so think about mounting, distance, and light management as the tent, sleeping bag, and headlamp of your indoor garden—each has to be in the right place for a comfy trip; you’ll want lights hung 6–12 inches above the canopy for most LEDs, but raise or lower them as your plants stretch, use adjustable hangers or pulleys so you’re not wrestling with a fern at midnight, and spread fixtures so the whole “campsite” gets even light instead of a single sunburned hotspot.
Use timers, monitor PPFD, allow airflow, and follow manufacturer distance guidance to avoid burn, clois, and wasted light.
Under-Canopy and Supplemental Lighting Strategies
Like setting up a campsite with a lantern tucked under the picnic table, under‑canopy lighting sneaks light where the big top lights can’t reach, and you’ll be amazed how much healthier those hidden leaves and lower buds get when you do it right.
You’ll add low‑profile LEDs beneath the canopy, tweak timers and dimmers, and watch yields jump while plants stay compact, airy, and disease‑resistant.
Price, Value, and Long-Term Reliability Considerations
When you start shopping for LED grow lights, you’ll feel a bit like gearing up for a camping trip—there’s gear everywhere, a bewildering range of prices, and you want the best kit without blowing your whole allowance—so let’s map the trail before you buy.
Pick mid-range ($100–$300) for value, check PPF/W and lifespan, favor IP65 and good heatsinks, and expect energy savings.
Overall
You’ve got this — pick lights that match each growth stage, balance PAR and energy use, and don’t skimp on mounting or under-canopy solutions, because a happy plant is a productive plant; I’ve tripped over a hanging fixture on a camping trip, so trust me, secure setup matters! Try a quantum board for full-spectrum, use budget LEDs for seedlings, and reserve high-output fixtures for CO2 rooms, and enjoy watching your indoor garden thrive while you plan your next outdoor excursion.