How to Build a Worm Bin for Garden Composting
To build a DIY worm bin, you’ll need a 14-gallon plastic tote or exterior-grade plywood box, avoiding toxic woods like cedar or redwood. Drill ventilation holes near the top and drainage holes at the bottom, then add layers of shredded cardboard, coconut coir, and newspaper until it feels like a wrung-out sponge. Start with 1,000 red wiggler worms per square foot, and feed them weekly with kitchen scraps. Let’s convert your garden waste into black gold together.
TLDR
- Choose a 14-gallon plastic tote or build a plywood box, avoiding toxic woods like cedar or pressure-treated lumber.
- Drill ventilation holes near the top and drainage holes at bottom using 1/4-inch and 1/8-inch drill bits.
- Create bedding layers using shredded cardboard, coconut coir, and newspaper, maintaining moisture like a wrung-out sponge.
- Add red wiggler worms at approximately 1,000 per square foot of bin space.
- Feed worms weekly, maintain proper moisture, and turn bedding regularly for optimal composting conditions.
Selecting the Right Materials for Your Worm Bin

When you’re ready to start your worm composting expedition, choosing the right materials for your bin is absolutely essential to creating a cozy home for your wiggly friends! You’ll want to select either a 14-gallon plastic tote, which is perfect for beginners, or build a box from exterior-grade plywood – just don’t use cedar, redwood, or pressure-treated lumber since they’re toxic to worms. The bin should be designed to accommodate 1 cubic foot of space for every pound of kitchen waste you plan to process. Additionally, ensure the bin is well-ventilated to promote proper air circulation within the composting environment.
Essential Tools and Construction Steps
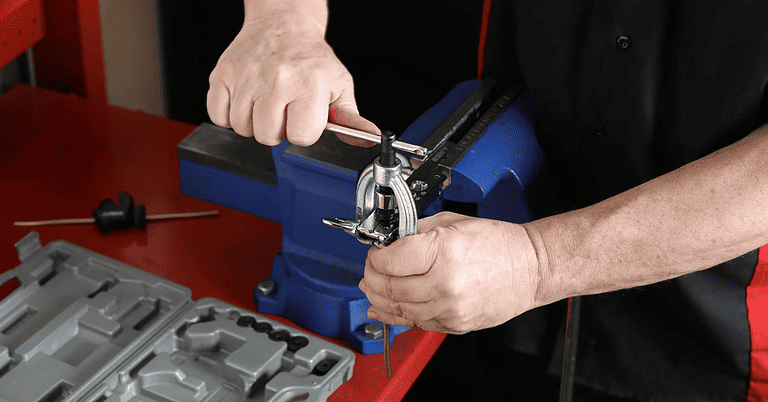
You’ll want to gather your basic tools first, including a drill with both 1/4-inch and 1/8-inch bits, safety glasses, and a spray bottle, since these items are absolutely essential for creating your worm bin’s drainage and ventilation system. Regular soil aeration promotes healthy conditions for worms, ensuring they thrive in their new environment. Once you’ve got your tools ready, you can follow a straightforward assembly sequence that starts with drilling those all-important holes (lots of them!) and adding properly moistened bedding. Using two stackable bins will make it easier to collect castings and allow worms to migrate between layers.
Your maintenance toolkit should include items you’ll use regularly, such as a spray bottle for moisture control and a basic thermometer to monitor temperature, which will help keep your worm friends happy and productive in their new home.
Basic Tools Needed
Building a successful worm composting system starts with gathering the right tools for the job, and fortunately, you won’t need anything too fancy or expensive.
You’ll need a basic hand drill with 1/16″ and 1/4″ bits for making ventilation holes, safety glasses to protect your eyes from flying plastic bits, a tape measure for precise dimensions, and saw horses if you’re planning to build a wooden bin.
Assembly Sequence Guide
Once all your tools are gathered, the assembly process for your worm bin follows a logical sequence that’ll make you feel like a composting engineer!
Start by drilling those quarter-inch holes near the top for ventilation, then add drainage holes at the bottom if you’re not using a moisture-controlled system.
Next, layer your bedding materials – mixing damp and dry components – before securing your lid and preparing to welcome your wiggly new tenants.
Maintenance Tool Requirements
Now that your worm bin’s basic structure is ready, let’s talk about the tools you’ll need to keep your wiggly friends happy and thriving!
You’ll definitely want a drill for creating ventilation holes, a spray bottle for moisture control, and some essential items like gloves and hand shovels for handling your worms and their bedding.
Don’t forget a trusty thermometer to monitor those cozy temperatures between 55-77°F!
Creating the Perfect Bedding Environment
When you’re setting up your worm bin, you’ll want to start by choosing excellent bedding materials like shredded cardboard, coconut coir, and newspaper, which work together to create a cozy home for your wiggly friends.
Getting the moisture balance just right is essential – your bedding should feel like a wrung-out sponge, not too wet and not too dry, so your worms can move around comfortably and do their composting magic.
To give your worms the best possible start, layer your materials carefully, placing the fluffier items like straw on the bottom for drainage, followed by a mix of your chosen bedding materials, and don’t forget to sprinkle in some soil from your garden to add beneficial microbes that’ll help jump-start the composting process. Additionally, incorporating coffee grounds into your worm bin can enhance the nutrient content and support healthier compost.
Selecting Prime Bedding Materials
Creating a cozy home for your worms starts with selecting the right bedding materials, which serve as both their habitat and a food source.
You’ll want to gather shredded brown cardboard (their absolute favorite!), chemical-free newspaper, and some coconut coir.
For best results, mix these materials together, and you can even add some aged compost to give your wriggly friends an extra nutrient enhancement.
Moisture Balance Essentials
Three key factors make moisture balance the cornerstone of a thriving worm bin: your worms’ need to breathe through their skin, their comfort level, and their overall health.
You’ll want to maintain moisture levels between 60-80%, which should feel like a wrung-out sponge when you squeeze the bedding.
Keep a spray bottle handy, and don’t forget to add drainage holes to prevent waterlogging.
Layering For Worm Success
Just as a home needs a strong foundation, your worm bin’s success depends on proper layering techniques that’ll keep your wiggly friends happy and productive.
Start with coarse materials like shredded newspaper at the bottom for drainage, add a middle layer of pre-composted matter or living soil, and top it off with two inches of fresh bedding.
Don’t forget to alternate bedding and waste as you go!
Choosing and Adding Your Worm Population
When starting your worm composting journey, selecting the right worms and establishing a healthy population is absolutely essential to your success.
You’ll want to choose red wigglers, which are perfect for beginners since they’re hardy and adaptable.
Start with about 1,000 worms per square foot of bin space, and give them time to settle into their new home before adding food scraps.
Proper Maintenance and Feeding Guidelines

Maintaining your worm bin’s health doesn’t have to feel like rocket science, and you’ll be amazed at how simple the daily care routine can be!
Keep your wriggly friends happy by feeding them once a week with properly-sized food scraps, while making sure their bedding stays moist but not soggy.
Remember to turn the bedding regularly for air circulation, and you’ll be rewarded with rich, nutrient-packed compost!
Harvesting and Using Your Worm Compost
After months of nurturing your worm bin, you’ll finally get to reap the rewards of your composting efforts!
You can harvest your nutrient-rich castings using several easy methods, like the pyramid technique where you’ll make small mounds of compost on a tarp, or try the light method where your worms naturally move away from brightness, leaving their wonderful castings behind for your garden’s benefit.
Overall
Now that you’ve built your very own worm composting system, you’ll soon be harvesting rich, nutrient-packed vermicompost that’ll make your garden absolutely thrive! Remember to check on your wriggly friends regularly, keep their bedding moist but not soggy, and feed them a balanced diet of kitchen scraps. Before you know it, you’ll be amazed at how these hardworking decomposers convert your food waste into black gold for your plants.