How To Cap A Copper Pipe
Are you ready to cap a copper pipe and take control of your plumbing? Like putting a lid on a simmering pot, checking a copper pipe is an essential skill any DIY enthusiast should have. Whether you’re dealing with excess pressure or need to stop the flow temporarily, push-to-connect fittings are your go-to solution. With their quick and straightforward installation process, these fittings make capping a breeze.
This guide walks you through capping your copper pipe using push-to-connect fittings. We’ve covered you, from shutting off the water supply to testing for leaks.
So grab your tools, and let’s begin this plumbing adventure!
Understanding the Basics of Capping a Copper Pipe
If you need to cap off a water line, you want to close or seal the end of a copper pipe to prevent water from flowing through it. Capping off a water line is essential because it helps maintain the integrity of your plumbing system and prevents any potential leaks or damage.
There are different methods to cap a copper pipe, including using push-to-connect fittings, soldering, or compression fittings, each with advantages and considerations. (Learn Hot Water In Some Faucets But Not Others)
What is Capping a Water Line?
To cap a copper pipe, you must understand what limiting a water line means. Here are three things you should know about limiting a water line:
- Capping a water line involves sealing off the end of a pipe to prevent water from flowing through it.
- This is commonly done when removing or replacing fixtures, shutting off unused lines, or repairing.
- The process typically requires caps, connectors, or fittings designed explicitly for capping off water lines.
Now that you understand the basics of capping a water line, let’s explore the importance of adequately capping off a water line.
Importance of Capping Off a Water Line
Ensure the integrity of your plumbing system and prevent potential water damage by properly sealing off a water line. To cap a copper pipe, start by shutting off the water supply and draining the pipe. Then, cut the pipe cleanly and clean the end. Push a push-to-connect cap onto the line until it reaches the depth mark. Test for leaks after turning on the water.
Now, let’s explore different methods of capping copper pipes.
Different Methods of Capping Copper Pipe
Explore various techniques for sealing off your copper water line to protect your plumbing system and prevent potential water damage. To cap a copper pipe, you can use compression or push-to-connect fittings. Before starting, make sure to shut off the water supply. Cut the line using a pipe cutter or hacksaw, ensuring a clean cut. Compression caps are available and suitable for this task.
Now let’s prepare for the task by gathering the necessary tools and materials.
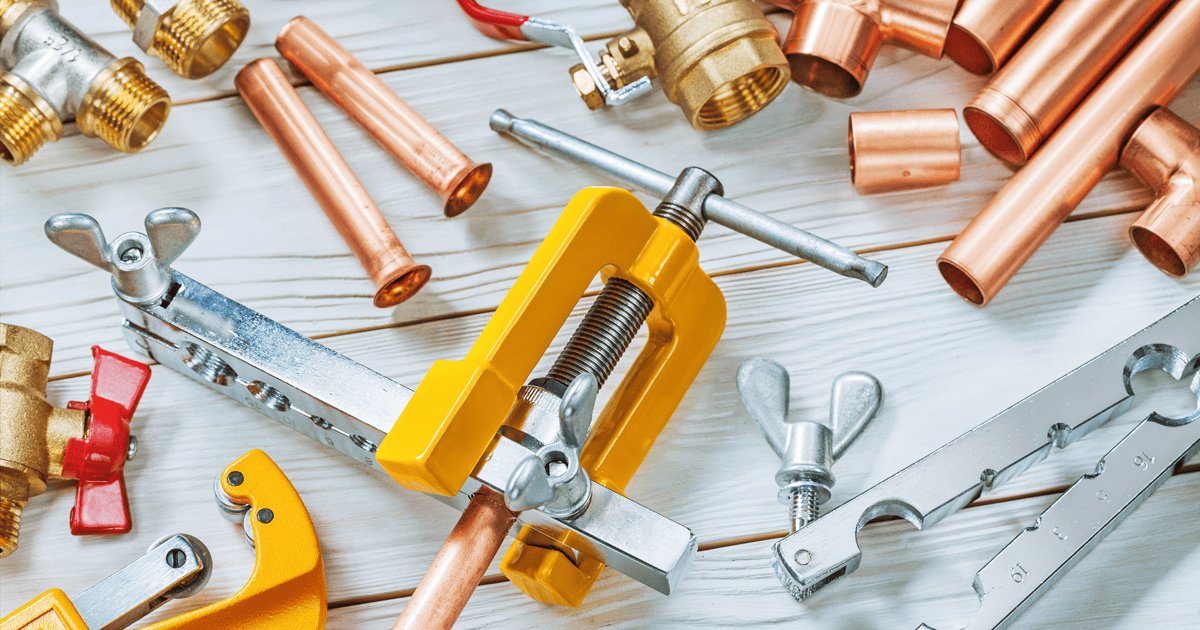
Preparing for the Task
You’ll need several tools and materials to prepare for capping a copper pipe. These include a tubing cutter or hacksaw, metal file, rag, tape measure, marker, emery cloth, and push-to-connect pipe caps. It’s essential to take safety precautions when working with copper pipes. Shut off the water supply to the house before cutting the lines and draining any residual water and pressure.
Necessary Tools and Materials
To cap a copper pipe, you’ll need a pipe cutter or hacksaw to make a clean and square cut. A push-to-connect fitting, such as an end cap, can be used for a quick and straightforward solution. Before capping the pipe, clean the pipe end with emery cloth and apply flux using a flux brush for proper sealing.

Pipe Cutter and Hacksaw
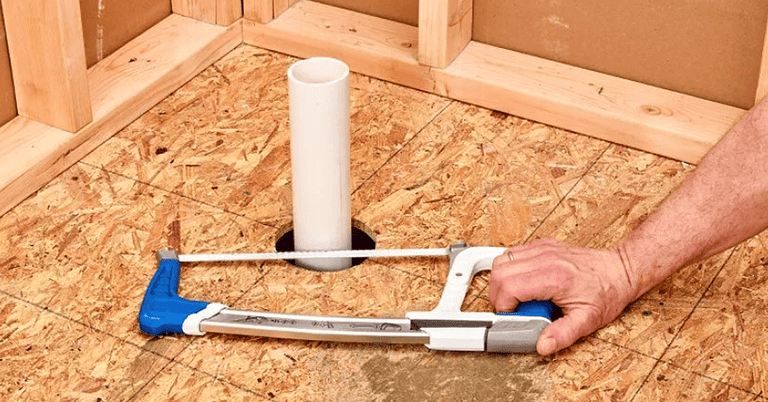
Using a pipe cutter or hacksaw, you can easily create a clean and precise cut on the copper pipe. Start by measuring and marking the desired length of the line. Then, position the cutter or hacksaw perpendicular to the bar and apply steady pressure while rotating it around the bar. Continue until you have completely cut through the line.
With your copper pipe cut, let’s discuss push-to-connect fittings for capping.
Push-to-Connect Fitting
Push-to-connect fittings, also known as push-to-fit connectors, are popular for capping water pipes due to their ease of installation and secure grip on various plumbing materials like copper, CPVC, and PEX. Start by turning off the water supply when using push-to-connect fittings to check a copper tube; then, cut the line cleanly and straight using a pipe cutter. (Learn How Long Do Pex Pipes Last)
Next, clean the end of the tube and apply flux. Finally, push the fitting onto the box until it reaches the desired depth mark.
Another option for capping a copper pipe is using an end cap…
End Cap
To cap off a copper water pipe, you’ll need an end cap that fits securely over the end of the line. The end cap is designed for copper tubing and ensures a tight seal. After cutting the copper pipe to the desired length, measure the clean and smooth cut. This will ensure that the end cap works properly and prevents leaks.
Now let’s move on to preparing the pipe with emery cloth…
Emery Cloth
When preparing your copper water tubing for capping, it’s essential to ensure a smooth and clean surface by utilizing an emery cloth. This abrasive material is perfect for removing any dirt, debris, or old solder from the inside and outside of the pipe. Using emery cloth creates an optimal surface for the line and cap fitting to create a tight seal.
Once you have achieved a clean cut with your pipe cutter or hacksaw, it’s essential to thoroughly clean the inside of the pipe before removing the fitting.
Next, we’ll discuss using flux and a flux brush to prepare for soldering.
Flux and Flux Brush
Flux and its accompanying brush are like a gentle breeze that sweeps away any lingering impurities, ensuring a pristine surface for the perfect soldering connection. Apply change to the cleaned end of the copper pipe using a flux brush to cover the entire surface. When heated, the difference acts as a cleaning agent and promotes proper solder adhesion.
Now, let’s move on to the next step: using a torch soldering kit to install the cap.
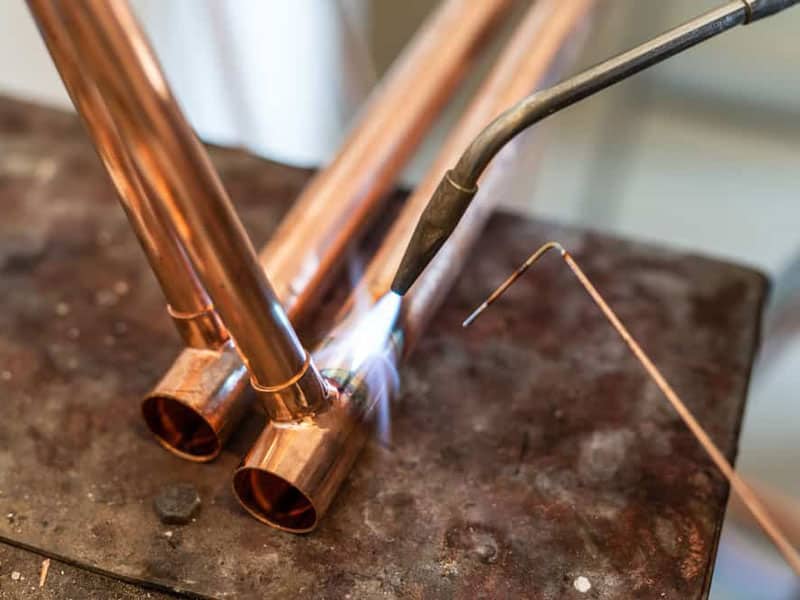
Torch Soldering Kit
To achieve a leak-free soldered joint, a torch soldering kit is needed. This method is considered more reliable and professional. First, cut the copper pipe cleanly using a pipe cutter or hacksaw. Then, dry the cap and pipe before applying the solder paste flux. Next, heat the joint with a propane torch until the flame has a blue center. Apply solder to create a glowing ring around the joint. Finally, cool the soldered joint with a damp cloth before testing for leaks. (Read Can You Use 1 1/2 Pipe For Shower Drain)
| Torch Soldering Kit | |
|---|---|
| Tools Needed | Propane torch Lead-free solder wire Copper cap fitting Pipe cutter Thin rubber hose |
| Steps | 1) Cut and drain the pipe. 2) Dry and clean the cap and pipe. 3) Apply flux paste. 4) Heat the joint with a torch until blue flame. 5) Apply solder for the glowing ring. 6) Cool with a damp cloth. 7) Test for leaks. |
For safety purposes, it’s essential to have a fire extinguisher nearby when working with open flames like torch soldering.
Fire Extinguisher
Safety should always be a top priority, and having a fire extinguisher nearby during any plumbing project is essential for peace of mind. There’s always a fire risk when working with a propane torch to heat copper pipe. Keep a fire extinguisher within reach in case of accidental flames or sparks.
Now let’s move on to the next section, discussing essential safety precautions when capping a copper pipe.
Safety Precautions When Capping a Copper Pipe
Taking some safety precautions is essential before cutting and capping your copper pipe. Start by shutting off the water supply to the area where you’ll be working. Locate the main water shutoff valve and turn it clockwise until it stops. This will prevent any water from flowing while you work on capping the pipe.
These safety precautions will ensure a smooth and hassle-free process when capping your copper pipe.
Now let’s move on to the step-by-step guide on caping a copper pipe…
Step-by-Step Guide on How to Cap a Copper Pipe
To cap a copper pipe, you’ll need to follow a step-by-step process.
First, shut off the water supply to the pipe that needs capping.
Next, use a pipe cutter to make a clean, straight cut on the copper pipe.
Then, prepare the end of the pipe by cleaning it and ensuring it’s free of any old solder or debris.
After that, attach the cap to the copper pipe using push-to-connect fittings or other suitable methods.
Finally, check for any leaks by turning on the water supply and inspecting for any signs of water leakage.
Shutting Off the Water Supply
To cap a copper pipe, start by locating the main shutoff valve for your water supply and turning it off. This will prevent additional water from flowing into the lines while you work. Next, minimize the water in the bar by opening faucets at the lowest point in your home and letting them run until they stop flowing.
Finally, it’s important to drain any remaining water and pressure from the pipes before cutting them to ensure a clean, safe cut for capping.
Locating the Main Shutoff Valve
As you enter the basement, your eyes scan the dimly lit room, searching for the main shutoff valve that will end the flowing water within the copper pipes.
Once you locate it, turn the valve clockwise to shut off the water supply.
Before capping the copper pipe, use a tubing cutter to make a clean cut at the desired location.
Clean the end of the pipe and put on one of the available caps explicitly designed for copper pipe.
Now, let’s move on to minimizing the water in the pipe before proceeding further.
Minimizing the Amount of Water in the Pipe
After successfully locating the main shutoff valve, take hold of its sturdy handle and turn it clockwise, like a captain at the helm of a ship guiding it towards safety. This will shut off the water supply to the copper pipe you want to cap. To minimize the amount of water in the line, open a nearby faucet or drain valve. You can use a hacksaw or pipe cutter to cut the end of the copper pipe before proceeding to cap it with either a compression fitting or push-to-connect fitting.
Now let’s move on to cutting the copper pipe…
Cutting the Copper Pipe
To make a clean cut with a pipe cutter, start by measuring and marking the desired length on the copper pipe. Then, place the pipe cutter around the pipe, ensuring the cutting wheel lines up with the mark. Rotate the blade around the tube several times, gradually tightening it after each rotation until it clears.
Alternatively, you can use a hacksaw to cut the copper pipe if you don’t have a pipe cutter. Begin by wrapping masking tape around the area you’ll be missing to help prevent slipping and ensure a straight line. Then, carefully saw back and forth using long strokes until you’ve cut through the entire section of pipe.
Always wear safety goggles when cutting copper pipes and avoid applying too much pressure or force while mowing to avoid damaging or deforming the line. (Learn How To Connect Two Hoses Together)
How to Make a Clean Cut with a Pipe Cutter
Start using a pipe cutter to make a clean cut on the copper pipe. A pipe cutter is a tool designed to cut lines cleanly and accurately. It consists of a sharp cutting wheel that rotates around the line, creating a smooth and even cut. To ensure the best results, follow these steps:
- Measure and mark the desired length of the line.
- Place the pipe cutter over the marked area, ensuring the cutting wheel is aligned.
- Tighten the cutter’s knob or handle to secure it onto the pipe.
- Rotate the blade around the line clockwise, applying gentle pressure.
- Continue rotating until you have made a complete revolution and feel slight resistance.
Using a pipe cutter can achieve a precise and clean cut on your copper pipes, making it easier to cap them securely later. If you don’t have access to a pipe cutter, other methods are available, such as using a hacksaw to cut copper pipes.
Note: Don’t forget to wear appropriate safety gear like gloves and goggles when working with tools.

How to Use a Hacksaw for Cutting Copper Pipe
To make a clean cut with a pipe cutter, you’ve learned about the previous subtopic. Now let’s explore an alternative method using a hacksaw.
Here’s how to use a hacksaw for cutting copper pipe:
- Measure and mark the desired length on the tube.
- Secure the tube in a vise or hold it firmly with one hand.
- Use the hacksaw to cut through the copper pipe along the marked line.
- Apply steady pressure and make smooth, even strokes until you’ve completely cut through the tube.
- Remove any burrs or rough edges with a file.
Now that you know how to use a hacksaw to cut copper pipe, let’s prepare the end of the line before capping it off.
Preparing the End of the Pipe
To prepare the end of the pipe for capping, start by cleaning it with an emery cloth to remove any old solder or debris. Use a back-and-forth motion to ensure a smooth and clean surface. Next, apply flux to the end of the pipe using a brush, covering the entire area evenly. The change will help facilitate the soldering process and create a strong bond between the cap and the line.
Cleaning the End of the Pipe with Emery Cloth
Using emery cloth, you can quickly smooth the end of the copper pipe, ensuring a clean and proper seal with the push-to-connect cap, leaving no room for doubt or leaks. Here are five steps to cleaning the end of the pipe with an emery cloth:
- Start by cutting a small piece of emery cloth.
- Wrap the emery cloth around your finger.
- Gently rub the end of the line in a circular motion.
- Continue until any old solder or debris is removed.
- Repeat this process on all cut ends of the lines.
Now that you’ve cleaned the end of the line, you can move on to applying flux for soldering.
Applying Flux to the End of the Pipe
Now that you’ve cleaned the end of the copper pipe with emery cloth, it’s time to move on to the next step: applying flux. Flux is crucial in soldering as it helps create a strong bond between the pipe and cap. To apply paste flux, use a brush or your finger to spread a thin layer on the end of the line. This will ensure a proper seal when attaching the cap to the copper pipe.
Moving forward, let’s discuss how to attach the cap securely.
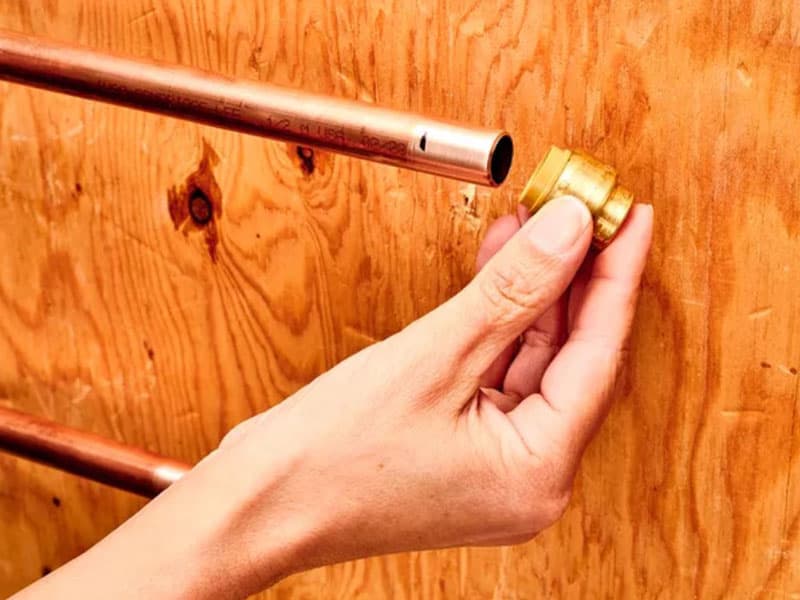
Attaching the Cap to the Copper Pipe
To attach a cap to the copper pipe, you have two options: a push-to-connect cap or soldering an end cap. A push-to-connect cap is the way to go if you prefer a quick and straightforward method. Clean the pipe end, push on the lid until it reaches the depth mark, and test for leaks afterward.
On the other hand, soldering an end cap is recommended if you want a more secure and permanent solution. This involves cutting and draining the pipe, applying flux and heat with a propane torch, and ensuring a properlyproperly soldered joint without leaks.
Using a Push-to-Connect Cap
If you want a quick and hassle-free way to cap your copper pipe, try using a push-to-connect cap – it’s simple and effective! First, use this method to ensure the water line is shut off. Then, cut the pipe cleanly and ream the inside of the cap. Push the small plastic push-to-connect cap onto the tube until it reaches the depth mark.
This method ensures a secure seal without any soldering or extra tools. However, if you prefer a more permanent solution, consider soldering an end cap to the pipe.
Soldering an End Cap to the Pipe
When soldering an end cap onto the copper tubing, you can create a lasting and secure connection as reliable as a weld on a steel beam. To do this, thoroughly clean the pipe and cap to remove any dirt or debris. Next, apply paste flux to the inside of the lid and the outside of the line.
Then, light a propane torch and heat the cap and pipe evenly until they reach soldering temperature. Once heated, remove the heat source and apply lead-free solder around the joint to create a strong bond once heated.
Finally, let the joint cool before checking for leaks in the next step about ‘checking for leaks.’
Checking for Leaks
Now, let’s ensure no sneaky leaks are hiding in your capped copper pipe. Place a bucket underneath the capped end of the line to check for leaks. Slowly turn on the water supply and observe the cap closely. If you see any water dripping or leaking, it means there’s a problem with the seal. In that case, you may double-check that the cap is securely fitted or consider using a different type of cap fitting.
Let’s explore some additional tips and tricks for capping copper pipes.
Additional Tips and Tricks for Capping Copper Pipes
If you’re dealing with underground copper pipes, capping them off can be more challenging. It’s essential to shut off the water supply and drain the pipes before cutting them. Push-to-connect fittings are a great option for capping a water line under pressure. They provide a secure seal without the need for soldering or additional tools.
Soldering is considered a reliable method to cap off a water pipe permanently. However, it does require specific tools and practice for proper execution.
Dealing with Underground Copper Pipes
To cap underground copper pipes, you can use push-to-connect fittings, a quick and straightforward solution that works with copper, CPVC, or PEX plumbing pipes. Here’s how to cap underground copper pipes:
- Shut off the water supply to the line.
- Drain any residual water from the line.
- Cut the line cleanly and straight using a tubing cutter or hacksaw.
- Clean the end of the tube with steel wool or emery cloth.
Now we’ll move on to capping a water line under pressure by…
Capping a Water Line Under Pressure
You can use a push-to-fit fitting to cap off a water line that’s under pressure, like a copper pipe. These fittings seal the pipe securely without soldering or additional tools. Here’s what you need to do:
- Start by shutting off the water supply and draining any remaining pressure.
- Then, cut the pipe cleanly and attach the push-to-fit adapter.
- Apply heat on the joint to make sure it’s tightly sealed.
Now let’s move on to how to cap off a water pipe permanently…
How to Permanently Cap Off a Water Pipe
Luckily, there’s a foolproof method for permanently sealing off a water line. You can use push-to-fit (push fit) fittings to cap off a copper pipe. These fittings are easy to install and don’t require any special tools or open flames. Here’s a step-by-step guide:
- Cut the line cleanly and straight.
- Clean the end of the line.
- Push the push-to-fit cap onto the pipe until it reaches the depth mark.
- Test for leaks by turning on the water supply.
Understanding plumbing codes related to capping copper pipes is essential for ensuring compliance and safety in your remodeling project.
Understanding Plumbing Codes Related to Capping Copper Pipes
When capping off water lines, adhering to plumbing codes to ensure safety and compliance is crucial. Understanding standard plumbing codes for capping copper pipes will help you make informed decisions and avoid potential issues. These codes outline specific requirements for materials, installation methods, and testing procedures. This ensures that the capped water lines are secure, leak-free, and meet industry standards.
Importance of Adhering to Plumbing Codes
Adhering to plumbing codes is crucial in ensuring the safety and reliability of capping a copper pipe, allowing homeowners to have peace of mind knowing that their plumbing system meets the necessary standards. Plumbing codes provide guidelines for proper installation techniques, materials, and fittings. Following these codes ensures that the cap on the copper pipe will be secure, preventing leaks or other potential issues.
Now let’s explore some standard plumbing codes for capping off water lines.
Common Plumbing Codes for Capping Off Water Lines
Ensure a secure and compliant capping of water lines by familiarizing yourself with standard plumbing codes. When capping off water lines, following these codes is essential to avoid potential hazards. For example, combustible surfaces must be protected when soldering or using open flames. Additionally, pipes should be adequately reamed and supported by wall studs to prevent leaks and damage. By adhering to these codes, you can ensure a safe and effective capping process.
Now let’s explore some troubleshooting common issues…
Troubleshooting Common Issues
If you encounter a situation where the cap doesn’t fit securely onto the copper pipe, there are a few things you can try. First, ensure that you have the correct size cap for your line. If it still doesn’t fit, use an emery cloth or steel wool to smooth out any rough edges on the line and make it easier for the cap to slide on.
If you’re dealing with a leaky cap, check if it’s properly seated and tightened. You may need to remove it and reapply Teflon tape or pipe joint compound before reinstalling. If the copper pipe can’t be cut cleanly with a hacksaw or tubing cutter, consider using an angle grinder with a metal cutting wheel for a clean and precise cut.
What to Do If the Cap Doesn’t Fit
Surprisingly, even though push-to-connect fittings are advertised as a quick and easy solution, there may be instances where the cap doesn’t fit properly on the copper pipe. Here are four things you can do if you encounter this issue:
- Check for any debris or residue inside the fitting and clean it thoroughly to ensure a proper seal.
- Apply lubricants, such as silicone grease or plumber’s grease, to the outside of the pipe before inserting it into the fitting. This will help minimize friction and make a clean connection.
- If the cap still doesn’t fit snugly, apply some water to create a temporary seal. This can be done using a wet rag or sponge to wet both ends of the pipe before inserting it into the fitting.
- In case none of these methods work, consider using Teflon tape or thread sealant on the male threads of the fitting to enhance its sealing capabilities.
Now that you know what to do if the cap doesn’t fit properly, let’s move on to how to handle a leaky cap.
How to Handle a Leaky Cap
To rectify a leaking connection, tighten the fitting using an adjustable wrench until the leak stops. Make sure to turn off the water supply before attempting this step. If pulling the fitting doesn’t stop the leak, you may need to disassemble and reassemble the cap to ensure a proper seal. Alternative solutions are available if you encounter difficulties during this process or if the pipe can’t be cut cleanly.
What to Do If the Pipe Can’t Be Cut Cleanly
Are you having trouble achieving a clean cut on your copper tubing? No worries; alternative solutions are available if the pipe isn’t cooperating. One option is to use a hacksaw instead of a pipe cutter for a clean cut. Another solution is to use copper tube glue, which can provide a leak-free seal even if the pipe isn’t cut perfectly. If these options don’t work, it may be time to call a professional plumber for assistance in capping your copper pipe properly.
When to Call a Professional Plumber
If you’re faced with a plumbing issue beyond your DIY skills, it’s important to recognize when to call a professional plumber. A professional plumber can provide the expertise and experience to tackle more complex plumbing problems.
They have the knowledge and tools to diagnose the issue accurately, offer practical solutions, and ensure the job is done correctly and safely.
Don’t hesitate to reach out for help when you need it!
Recognizing When DIY Isn’t Enough
When DIY just isn’t enough, it’s essential to know that improper installation of push-to-connect fittings can lead to excess pressure or water hammer, causing flood damage. Did you know that push-to-connect fittings are relatively expensive compared to other capping methods?
To ensure a proper and reliable cap on your copper pipe, it may be necessary to call in a professional plumber with the experience and knowledge to handle the job correctly.
How a Professional Plumber Can Help
By enlisting the expertise of a professional plumber, you can ensure that your water line is securely sealed and protected, providing peace of mind for years to come. A professional plumber has the knowledge and experience to cap your copper pipe correctly using the appropriate tools and techniques. They will ensure a proper seal without any leaks, minimizing the risk of future damage or issues.
Hiring a professional plumber guarantees a reliable and long-lasting solution for capping your copper pipe.