Pilea Peperomioides Care: Tips for a Happy Plant
You’ve got this—place your Pilea in bright, indirect light near an east or west window and rotate it weekly so it doesn’t tiptoe toward the sun, water when the top inch of soil feels dry (about once a week), use a fast-draining mix with perlite and a pot with drainage, keep humidity around 40–60%, fertilize monthly spring–fall, prune leggy stems and save the tips for propagation, watch for pests, and if you want more tips to help it thrive, keep going.
TLDR
- Bright, indirect light (east/west window) with weekly rotation prevents legginess and leaf burn.
- Water when the top inch of soil is dry, roughly weekly; avoid soggy soil and ensure drainage.
- Use a fast-draining mix (2/3 potting mix, 1/3 perlite/pumice) in a pot with drainage holes.
- Maintain 40–60% humidity, good airflow, and avoid cold drafts to reduce fungal and pest issues.
- Fertilize monthly spring–fall at half strength, prune leggy stems, and propagate pups from rhizomes.
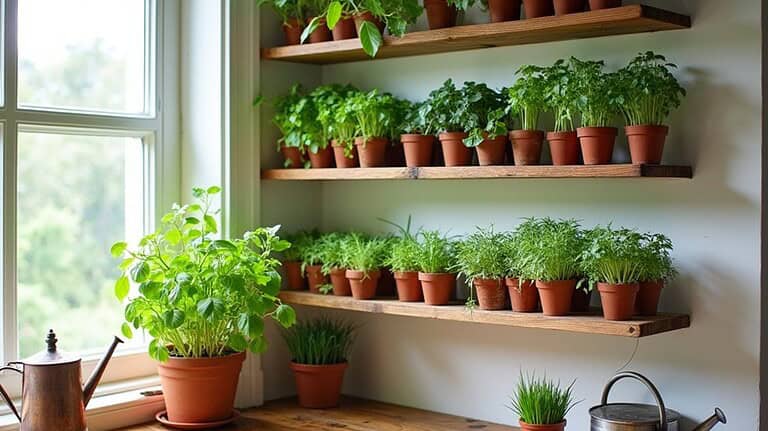
Light Needs and Placement
If you want your Pilea to throw little baby plants like confetti at a campsite, give it bright, indirect light—think of a sunny picnic under a big tree rather than roasting marshmallows over an open flame.
Place it near an east or west window with sheer curtains, rotate weekly so growth stays even, avoid dark corners, and shield leaves from harsh midday sun to prevent burns. For best results, keep the leaves dust-free to maximize light absorption. Adding companion plants with contrasting foliage can create a pleasing visual backdrop and improve the overall display of your Pilea in mixed borders.
Watering Schedule and Techniques
Usually you’ll water your Pilea about once a week during its active growing season, but think of it like planning for a camping trip—check the weather (or in this case, the soil), pack the right gear, and don’t drown the campsite; stick your finger an inch into the soil to see if it’s dry before you pour, because overwatering is the plant equivalent of forgetting the tent stakes and waking up in a puddle. Monitor soil moisture daily to maintain consistent moisture for strong root growth.
Pilea recover from a little drought way better than they do from soggy roots, so err on the side of caution, adjust for hot summers or humid bathrooms, and remember that younger pups usually need water more often while older, lazier plants can stretch to two weeks or more between drinks.
Also, make sure the pot has drainage holes to prevent waterlogging.
Ideal Temperature and Humidity
When you’re treating your Pilea like a tiny travel buddy on a camping trip, think warm and steady—these cheerful little plants thrive best between about 60°F and 80°F (15°C to 27°C), so keep them somewhere that feels like a comfy daytime hike rather than a frostbitten summit, and don’t let temps drop below roughly 50°F (10°C) or you’ll see growth slow or leaves suffer.
Keep humidity around 40–60%, avoid cold drafts, mist lightly if winter heating makes air too dry, and make certain good airflow to prevent fungal issues; move it before nights get too chilly, and you’ll both stay happy. Red light promotes larger, taller, bushier plant growth and influences flowering, seed-making, and oil storage, so consider light quality when positioning your plant—red light can encourage bushier growth.
Choosing the Right Soil and Pot
On a sunny windowsill or tucked into a cozy corner, choosing the right soil and pot for your Pilea is a bit like packing gear for a short camping trip—you want lightweight, breathable stuff that drains well and keeps things comfortable, not soggy; I always envision my Pilea as a tiny backpacker who hates wet boots.
Use a 2/3 potting mix, 1/3 perlite or pumice, coarse sand optional, and pots with drainage holes, slightly upsizing by 1–2 inches, repot in spring, avoid dense soil, and pick porous clay or ceramic for faster drying. Adding organic matter like compost can improve structure and nutrient availability without making the mix heavy.
Fertilizing for Healthy Growth
Often you’ll find that a little fertilizer is the secret backpack of nutrients your Pilea needs to keep trekking happily through the seasons, so don’t skip it like you’d forget a rain jacket on a hike—I’ve learned that the hard way when my little plant looked sulky after one long, dull winter.
Feed monthly in spring–fall with a balanced liquid at half strength, water first, watch for white crust, and pause in winter.
Pruning and Leaf Care
Ready to give your Pilea a little haircut and spa day? Trim those leggy stems to keep it compact and bushy—pinch or snip them back with clean scissors, and don’t be shy about removing any yellow or damaged leaves so the plant can focus on healthy growth.
While you’re at it, wipe each leaf gently with a soft, damp cloth to banish dust (I always pretend I’m polishing my camping mug after a long hike), which helps light reach every green fan and keeps your plant looking fresh.
Trim Leggy Stems
If your Pilea starts looking like it’s trying out for a role as a houseplant giraffe, now’s the perfect time to tame those leggy stems and bring back that cute, round shape you love—do this in early spring so new growth has the whole season to fill in, and you’ll thank yourself later.
Pinch stems above nodes, wear gloves, prune regularly, save tips for rooting.
Remove Damaged Leaves
When you spot yellowing, crispy, or spotty leaves on your Pilea, don’t just sigh and hope they fix themselves—grab clean scissors and deal with them, because removing damaged foliage quickly helps the whole plant bounce back faster.
Cut close to the stem with sterilized blades, don’t remove over a third at once, and watch for pests or fungus so new growth can thrive.
Clean and Dust Leaves
Usually you’ll want to give your Pilea’s leaves a gentle wipe about every two weeks, because dust and mineral gunk are sneakier than camp mosquitoes and they’ll quietly block stomata and slow photosynthesis if you ignore them; I always envision my plants wearing tiny, sad sunglasses when they’re dusty, and honestly a quick clean brings them back to life like a little campsite glow-up.
Wipe gently with a supported hand, dry then damp cloths, check undersides, avoid polishes, and rinse carefully if needed, keeping cloths clean to prevent spreading pests.
Propagating Pups Successfully
Ready to plunge into pup-propagating mode? You’ll spot dime-sized pups at the mother plant base, dig gently, sterilize a blade, and cut the rhizome, keeping roots intact; wear gloves.
If rootless, pop pups in water until roots form, or plant straight into fresh, airy soil. Keep them bright but not sunburned, moist-not-soggy, and cheer them on like tiny camping companions.
Common Pests and How to Treat Them
You’ll want to know the usual suspects that like to crash your Pilea’s camping trip—aphids, mealybugs, scale, spider mites and those annoying fungus gnats—because spotting them early makes treatment way easier and less scary.
Want some quick, mostly natural fixes you can try right away? Try dabbing mealybugs and scale with alcohol, spraying aphids and mites off with a strong stream of water, using neem oil or a mild Castile soap spray for tougher infestations, and remember to prevent future invasions by keeping soil just right, quarantining new plants, and giving your Pilea good airflow and clean leaves.
Common Pests Overview
Often you’ll spot a tiny invader before you know it, hiding under a leaf or clustering on a fresh new shoot, and honestly, it feels a bit like finding a surprise campsite guest who forgot to bring a tent—you want them gone fast.
Watch for aphids, mealybugs, scale and fungus gnats; they suck sap, cause stunting, honeydew and sooty mold — check often, act quickly.
Natural Treatment Options
Think of pest-fighting like running a campsite sweep after an unwelcome guest — you want to find them, evict them, and make sure they don’t come back, and thankfully there are gentle, natural tools you can use on your Pilea that do just that.
Use castile soap or neem spray daily for 7–10 days, dust diatomaceous earth on dry foliage, and pick off bugs with alcohol swabs.
Preventive Care Tips
Sweeping your Pilea for pests is a lot like doing a campsite check after a long hike—look under the leaves, shine a flashlight at odd angles, and don’t be shy about getting your hands a little dirty—because catching a problem early makes the rest so much easier.
Check for webbing, white fluff, tiny flies or sticky honeydew; water right, raise humidity, wipe leaves, use yellow traps, and act fast.
When and How to Repot
If your Pilea starts squeezing itself into its pot like a sleepy hiker trying to cram into a too-small tent, it’s probably time to repot, and spring or early summer is the best season for the move because warmer temperatures and longer days help roots recover faster.
Check for roots poking out, choose a pot 1.5× larger with drainage, loosen roots, add fresh soil, water lightly, and avoid winter moves.
Overall
You’ve got this — treat your pilea like a tiny travel buddy: give it bright, indirect light like a cozy campsite, water sparingly so roots don’t drown, and feed occasionally to keep pup excursions going; repot when it’s cramped, prune yellow leaves, and check for pests like a curious camper scouting trails. Try propagating pups to share with friends, ask questions as you go, and enjoy watching your plant pack on personality, one round leaf at a time.