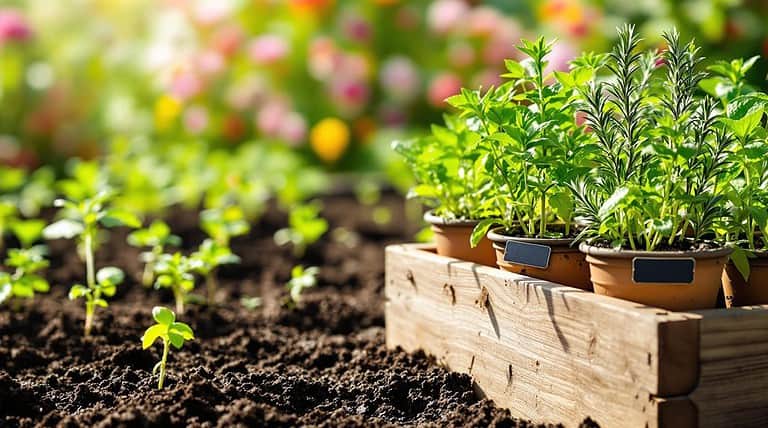
Growing Kiwi Fruit: From Garden to Table
You can totally grow kiwi in your backyard — pick a cold‑hardy or fuzzy type that fits your climate, plant it on a sunny, slightly sloped spot with deep, composty, well‑drained soil, and set a sturdy trellis with a nearby male vine for pollination; water deeply, mulch, and protect young shoots from frost and wind, prune yearly to keep fruiting wood, and harvest when sugars peak, then chill to ripen indoors — keep going and you’ll learn how to get them table‑perfect.
TLDR
- Choose cold- or heat-tolerant kiwi varieties matched to your climate and plant at least one male vine for pollination.
- Prepare deep, well-drained loamy soil, loosen 12–18 inches, add compost, and adjust pH to about 5.5–6.5 based on soil tests.
- Plant on a sunny, gently sloping site with frost protection, spacing vines 10–15 feet and providing sturdy trellises or arbors.
- Water deeply (about weekly when established) with drip irrigation, mulch widely, and avoid waterlogged roots or salt buildup.
- Train and prune annually for airflow and fruiting, monitor pests/diseases, and harvest ripe fruit by hand then store or ripen as needed.
Choosing the Right Kiwi Variety for Your Climate
Picking the right kiwi is a lot like packing for a trip—if you’re headed to Alaska you wouldn’t bring flip-flops, and if you’re going to Florida you wouldn’t pack a parka—so you’ve got to match the variety to your climate before you plant anything.
You’ll choose arctic or hardy types for cold zones, fuzzy for warm, hairless for subtropical, and remember pollination needs.
Many gardeners also find it helpful to know that there are about 50 different kiwi plant varieties available.
For winter-growing success, consider companion planting and site selection to maximize cold tolerance in your vine.
Assessing Soil Conditions and Ph Requirements
Before you dig in—literally—think of your soil like the campground where your kiwi vines will stay: you wouldn’t pitch your tent in a soggy hollow or on sharp rocks, so don’t plant where the ground can’t give roots air, water balance, and the right chemistry. Regular soil testing helps you monitor pH and nutrient levels so you can correct problems before planting.
Test pH a year ahead, aim near 5.6–6.0, fix with lime or sulfur, and make certain deep, well‑drained loamy soil. Adding a male vine nearby improves fruit set and size.
Selecting the Perfect Planting Site and Orientation
You’ll want to pick a spot with good soil drainage and a gentle slope so water runs away from the roots, not toward them, because soggy feet will rot your kiwi faster than a rainy camping trip can ruin a tent.
Think about sun exposure and aspect too — aim for a southern or southwestern-facing site that soaks up most of the day’s light, and ask yourself where the sun hits at noon and late afternoon so your vines don’t get shaded by the garage or that giant maple you secretly wish would go camping elsewhere.
Finally, give your plants shelter from strong winds with natural windbreaks like hedges or a fence, or set up a sturdy trellis, because trust me, after wrestling a tent in a gale I’d choose calm for my kiwis any day. Also consider testing your soil to check pH and nutrients for best results with soil testing.
Soil Drainage and Slope
Think of soil drainage like the campsite for your kiwi vines: if the ground’s a soggy low spot where puddles hang around, those roots will be miserable fast, but if it’s gently sloped and well-drained, your plants will thrive—so look for loamy or sandy loam soils that let water move through while still holding enough moisture, and if the native soil’s heavy clay, plan on raised beds or mounds to lift roots out of trouble.
Slight slopes help drainage and reduce frost pockets, so pick a gentle incline, add organic matter, test pH, and protect from harsh winds—your vines will thank you with healthier roots and better fruit.
Sun Exposure and Aspect
You’ve already thought about keeping those kiwi roots happy by picking well-drained soil and a gentle slope—now let’s talk about where the sun should hit your vines, because sunlight is basically the campsite coffee for fruit: it wakes everything up and makes it tasty.
Aim for full sun, six to eight hours, on a north-facing slope here to avoid frost, yet beware sudden intense late sun; acclimate or shade if needed.
Wind Protection and Shelter
If you’ve ever camped on a windy ridge and spent half the night wrestling your tent stakes, you’ll get why wind protection matters for kiwifruit—those vines have juicy, soft growth that the wind can shred or dry out fast, so pick a site that shelters them without turning the air into a stagnant sauna.
Choose gentle slopes, near trees or buildings, orient rows north–south, space vines about 10 feet, and use temporary row covers or staggered windbreaks until permanent shelter grows—trust me, your vines will thank you!
Preparing Soil and Raised Beds for Planting
You’ll want to start by testing your soil’s pH so you know if it’s happily acidic around 5.0–6.5 or needs lime or sulfur to get there, because kiwi roots hate standing water and picky nutrients — I learned that the hard way after a soggy spring ruined my camping-style optimism.
Build raised beds about 6 to 10 inches high, mix in plenty of compost or well-rotted manure, and pack them on a slight slope or mound to keep drainage moving away from the crown, which is kind of like pitching a tent on a hill so the rain runs off (trust me, it works).
Now grab a soil test kit or send a sample to the lab, plan your bed layout on the sunniest, least frosty part of the yard, and let’s get these vines a comfy, well-drained home. Aerating the soil before planting can help roots get oxygen and avoid compaction issues, so gently poke the beds with a tool to improve soil aeration.
Soil Ph and Testing
Because healthy kiwifruit vines start with the ground beneath them, getting your soil pH and tests right before you plant will save you a ton of headaches later—trust me, I learned that the hard way after wrestling with a soggy trellis and sad little leaves for a season.
Test months ahead, aim pH 5.0–6.8, add sulfur or lime, mix compost, secure drainage, avoid salts.
Raised Bed Construction
Let’s dig into raised beds for your kiwifruit like we’re packing a rucksack for a weekend hike—smart, sturdy, and ready for anything; good beds lift roots out of soggy ground, give vines room to breathe, and make trellis work way less of a wrestling match.
Build 12–24 inch beds, 3–4 feet wide, north–south if you can, use rot‑resistant edges, mix lots of compost, loosen 12–18 inches, remove weeds, and install drip irrigation.
Drainage and Slope Management
You’ve already built sturdy, compost-rich raised beds that would make any backpacker proud, so now think about how water moves through the campsite—uh, I mean, your kiwi patch—because good drainage and smart slope choices keep roots healthy and vines happy.
Pick a gentle, north-facing slope, fix compacted clay with deep tillage and organic matter, add 6–10″ beds, and control runoff with contours.
Planting Techniques, Spacing, and Initial Care
On a warm, sheltered slope with good sun, planting kiwifruit is kind of like setting up a cozy campsite for a long road trip—you want the spot to be comfy, dry underfoot, and easy to get back to for maintenance, so pick well-drained, compost-rich loamy soil that your vine’s roots (which can go more than four feet deep) can burrow into without hitting clay or standing water.
Avoid low-lying frost pockets that’ll nip tender shoots, clear out perennial weeds first, and work aged compost into the hole before you plant.
Space vines 10–15 feet, plant in spring or fall, mulch, water evenly, feed lightly year one, prune to one strong leader and stake it.
Trellis Systems and Support Structures for Vines
Because kiwi vines are like overexcited campers who bring a ton of gear, you’ll want a trellis that’s built like a sturdy campsite shelter—strong, roomy, and easy to work around—so your vines can climb, spread their leaves, and hang fruit without pulling the whole setup down.
Use T-bars, arbors, or espalier, anchor posts in concrete, run heavy wires, train trunks, prune annually, and enjoy!
Watering Needs and Managing Irrigation
Now that your trellis is set up like a good campsite—solid posts, wires tight, and vines trained where you can reach them—you’ve got to think like a careful camper when it comes to watering: kiwi plants don’t like to be left to parched, and they don’t like to sit in puddles either.
Water deeply about once weekly for adults, more for youngsters, wetting to one foot; use drip or soaker, check soil, avoid standing water, and watch for wilting.
Fertilization, Mulching, and Nutrient Management
You’ll want to keep your soil slightly acidic to neutral, about pH 5.5–7.0, because kiwi vines crave that sweet spot for taking up nitrogen and potassium — have your soil tested so you’re not guessing like I did on a rainy camping trip when I once tried to adjust pH with lime and nearly turned my campsite into a chemistry lab.
When you spread organic mulch like straw or well-rotted compost, lay it in a wide ring 12–36 inches from the trunk, keep it off the stem, and replenish it each year to lock in moisture, feed microbes, and cut down on weeding (mulch is basically the lazy gardener’s best friend, trust me).
Think of pH checks and mulch as your regular pit stops on the road trip to delicious kiwi harvests — schedule them, enjoy the process, and don’t be afraid to tweak things based on test results and how your vines look.
Soil Ph Management
If you want your kiwifruit vines to be as happy as we’re on a sunny campsite morning, start by getting the soil pH right—it’s the backbone of fertilization, mulching choices, and all nutrient management you’ll do, and trust me, fiddling with pH after planting is about as fun as trying to pitch a tent in a windstorm.
Test well early, aim 5.6–6.5, add dolomite to raise, sulfur to lower, watch CaCO3 and salts, and base fertilizers on soil reports so roots thrive.
Organic Mulch Application
Tossing a generous layer of organic mulch around your kiwi vines is like tucking them into a cozy sleeping bag after a long day of adventuring—your plants will thank you, and you’ll sleep better knowing the soil’s protected; I’ve spread lucerne hay and aged wood chips at campsite gardens and watched roots perk up like campers at sunrise.
Use compost, fruit waste, or wood chips to retain moisture, suppress weeds, balance nutrients, and enhance microbes, but watch C:N ratios so fresh sawdust doesn’t steal nitrogen.
Pest and Disease Monitoring With Prevention Strategies
Keeping an eye on pests and diseases in your kiwifruit orchard is like being a campsite leader who scans the treeline for bears—stay alert, act fast, and don’t panic; you’ll catch problems early and save a ton of grief later.
Inspect canes and fruit, use sticky traps, log sightings, sterilize tools, remove infected material, choose resistant cultivars, and time sprays or biologicals wisely to prevent outbreaks.
Protecting Vines From Frost, Heat, and Wind
When you’re out in the orchard—sort of like on a camping trip where you’ve got to watch the weather and protect your tent—you’ll learn fast that kiwi vines need a lot of babysitting when temperatures wobble, because frost, heat, and wind can wipe out a season of fruit in a single cold night or scorch a crop during a heatwave; so let’s talk practical, no-nonsense ways to keep your vines cozy or cool, depending on what Mother Nature throws at you.
Use overhead sprinklers for frost, wrap trunks, cover shoots, mulch and mist in heat, set windbreaks and sturdy trellises, choose sloped sites, prune smartly, and don’t overfertilize.
Harvest Timing, Picking Methods, and Postharvest Handling
Because fruit keep changing even after they look full-size, you’ve got to think like a backpacker watching the weather—patient, prepared, and ready to move fast—so harvest isn’t just “pick when it looks ripe”; it’s a careful mix of timing, testing, and gentle handling that decides whether your kiwis taste like candy or sad mush.
Pick with stems, test sugar, cool fast, ripen off-vine, avoid bruises, plan crews, and stash in cold storage, then pull out days before eating—or bag with apples to speed it up; I love that camping-style readiness, it makes harvesting feel like a tiny excursion.
Long-Term Pruning, Maintenance, and Productivity Management
Pruning your kiwi vines for the long haul is sort of like packing for a week-long backpacking trip: you’ve got to plan, pare back, and protect the structure so everything stays light, strong, and productive over time.
Prune in late winter, remove dead wood, train laterals along sturdy trellis wires, balance fruiting wood, renew old wood gradually, and maintain trellis and spacing to enhance airflow and yield.
Overall
You’ve got this—planting kiwis is like prepping for a fun camping trip: plan ahead, pick the right spot and variety, pack good soil and steady trellises, and check for pests like you’d check your tent for holes; doesn’t that sound doable? Keep pruning yearly, protect vines from frost and heat, and harvest when fruits are sweet and slightly soft. I’ve tried it myself, and trust me, fresh homegrown kiwi tastes like a mini outdoor escapade.