Growing Wine Cap Mushrooms: A Fun Edible Project
You’ll love growing wine cap mushrooms – they’re perfect for beginners and produce impressive harvests! Start by finding a shady spot in your garden, then layer hardwood chips or straw with mushroom spawn in spring or fall. These low-maintenance fungi will thrive for up to three years while improving your soil’s health. Just keep the beds moist, and you’ll be harvesting delicious mushrooms from May through October. There’s so much more to uncover about making your garden a mushroom paradise.
TLDR
- Wine Cap mushrooms are beginner-friendly and can produce harvests for up to three years while improving your garden soil’s health.
- Choose a partially shaded location with good drainage and establish your bed using hardwood chips or straw as substrate.
- Layer pre-soaked substrate with mushroom spawn, building up to 3-5 inches for wood chips or 5-10 inches for straw.
- Maintain consistent moisture throughout the growing period and harvest mushrooms from late May through October.
- Store freshly harvested mushrooms in paper bags in the refrigerator or preserve them through dehydration, freezing, or pickling.
Why Wine Cap Mushrooms Are Perfect for Home Growing

When you’re looking to start growing your own mushrooms at home, Wine Caps should definitely be at the top of your list, as they offer an incredible combination of benefits that make them perfect for beginners and experienced gardeners alike. You’ll love how these adaptable fungi don’t need much maintenance, thrive in various conditions, and can keep producing for up to three years while helping improve your garden’s soil and naturally controlling weeds. They perform exceptionally well in shady garden spots, making them an excellent choice for underutilized areas beneath trees or along north-facing walls. Additionally, their growth often indicates healthy soil, as mushrooms can enrich soil nutrients and improve water retention capabilities.
Essential Tools and Materials for Your Mushroom Garden
Three essential components form the foundation of a successful Wine Cap mushroom garden: your growing substrate, high-quality spawn, and the right set of tools to bring it all together.
You’ll want to gather hardwood chips (alder, maple, or oak work great!) or straw for your base, pick up some reliable sawdust or straw spawn, and equip yourself with basic tools like rakes, gloves, and a good watering system. For optimal results, hardwood chips should be given several months to age before being incorporated into your mushroom bed. Additionally, creating a mud-free pathway around your mushroom garden can help maintain cleanliness and prevent soil compaction.
Choosing the Best Location and Timing

Now that you’ve got your tools and materials ready, let’s get your Wine Cap garden started in the perfect spot!
You’ll want to find a partially shaded area where moisture-loving mushrooms will thrive, like under trees or beside garden plants.
If you’re planting in spring or fall, you’ll have the best success, and remember, your chosen spot should have excellent drainage and plenty of organic matter. Topsoil is essential for healthy growth, as it contains the nutrients and organic matter necessary for your mushrooms to flourish.
Preparing Your Growing Space and Substrate
Since successful Wine Cap cultivation depends heavily on your substrate choice and preparation, getting this step right will make all the difference in your mushroom-growing expedition!
You’ll want to start with either soft hardwood chips, like box elder or magnolia, or clean straw from oats or wheat.
For the best results, consider blending both materials, ensuring they’re properly moistened to 60-75% and free from contamination.
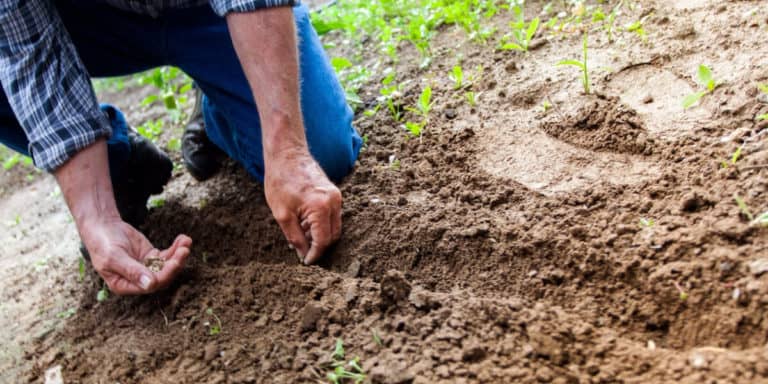
Step-by-Step Planting Guide

You’ll find that creating your Wine Cap mushroom bed is a lot like making a lasagna, where you’ll layer your materials to create the perfect growing environment.
To get started, spread a generous 4-inch layer of soaked straw or wood chips as your foundation, and then sprinkle your spawn evenly across the surface, much like you’re adding cheese to that lasagna.
For the best results, you’ll want to continue this layering process until you’ve reached your desired bed depth – about 3-5 inches for wood chips or 5-10 inches for straw – making sure each layer is well-moistened and properly inoculated with spawn.
Layering Your Mushroom Bed
While creating a thriving wine cap mushroom bed might seem complex at first, the layering process is actually quite similar to making a delicious lasagna – just layer, layer, layer!
Start with a thick 2-4 inch base of wood chips or straw, sprinkle your spawn evenly across it (like cheese!), and add another substrate layer.
Keep building until you’ve reached 6-10 inches total, making sure to top it off with a protective final layer.
Ideal Planting Depth Techniques
Before diving into your wine cap mushroom expedition, understanding the perfect planting depth is absolutely essential for success, and fortunately, it’s not as complicated as rocket science!
If you’re using hardwood chips, you’ll want to layer them 3-5 inches deep in shady spots, or go deeper (6-8 inches) for sunny areas.
For straw beds, aim for 5-10 inches, and remember, the shadier your spot, the less depth you’ll need to maintain moisture.
Caring for Your Wine Cap Mushroom Bed
Three key elements make caring for your wine cap mushroom bed a rewarding experience: proper location, consistent moisture, and patient monitoring.
You’ll want to place your bed in a shaded spot, which helps retain moisture and reduces your watering needs.
Keep the bed damp (but not waterlogged) with about an inch of water weekly, and don’t forget to check regularly for mycelium growth, which tells you you’re on the right track!
When and How to Harvest Your Mushrooms

Once you’ve nurtured your wine cap bed through spring and summer, you’ll be rewarded with a bountiful harvest that typically runs from late May through October!
For the best flavor, harvest your mushrooms before their veil opens by cutting near the base with a sharp knife or giving them a gentle twist.
Instead of washing, simply brush off any dirt, pop them in a paper bag, and store them in your fridge to keep them fresh!
Making the Most of Your Mushroom Harvest
Now that you’ve successfully harvested your wine cap mushrooms, you’ll want to make the most of these versatile and delicious fungi!
You can preserve them through dehydration, freezing, or even pickling, and don’t forget to try making mushroom butter.
For the freshest flavor, sauté them with garlic in butter or olive oil, or add them to your favorite soups, pasta dishes, and tacos.
Tips for Year-Round Mushroom Production

You’ll find that growing Wine Cap mushrooms year-round isn’t as tricky as you might think, especially when you match your growing strategies to each season’s unique conditions.
In winter months, you can set up an indoor growing station with controlled temperatures between 50-70°F, while in warmer seasons, you’ll want to focus on outdoor beds under trees or in shaded areas where you can manage moisture levels more easily.
When you’re working with multiple growing locations throughout the year, remember that maintaining consistent temperature control through methods like mulching, shade cloth, or indoor climate systems will help you keep harvesting these tasty mushrooms no matter what the calendar says.
Seasonal Growing Strategies
While many gardeners think of mushroom growing as a spring-only activity, cultivating wine cap mushrooms can actually be a rewarding year-round pursuit with the right seasonal strategies!
You’ll want to start in spring for multiple harvests, but don’t stop there – keep expanding your beds through summer with proper shading and moisture, prep them in fall with fresh substrate, and protect them in winter with a cozy straw blanket.
Temperature Control Methods
Since maintaining the right temperature is essential for successful wine cap mushroom cultivation, mastering temperature regulation methods will become your secret weapon for year-round harvests!
You’ll want to keep your mushrooms cozy between 50-70°F, using heaters in winter and cooling techniques in summer.
For outdoor beds, don’t forget to create protective microclimates with mulch and partial shade, while indoor growers should rely on thermostats and good air circulation.
Overall
Now that you’ve learned how to grow your own wine cap mushrooms, you’re ready to join the fascinating world of mushroom cultivation! Whether you’re excited about harvesting your first crop, planning to expand your mushroom bed, or dreaming up new recipes for your homegrown fungi, remember that patience and attention to detail will reward you with delicious, nutritious mushrooms right from your backyard. Keep experimenting, and don’t forget to share your success stories with fellow mushroom enthusiasts!