How To Replace Subfloor Under Wall
You may be hesitant to tackle replacing a subfloor under a wall, especially if the wall is load-bearing. However, completing this challenging project successfully with the right tools and guidance is possible. The subfloor plays a vital role in providing stability to the floor and walls, so addressing any signs of damage, such as water damage or structural issues, is essential.
In this article, we will provide a step-by-step guide on replacing the subfloor under a wall. We will also discuss special considerations for load-bearing walls and offer tips and tricks for a successful subfloor replacement. While some situations may require professional assistance, you can tackle this project and ensure a sturdy foundation for your flooring system with the proper knowledge and precautions.

What is a Subfloor, and Why Should You Replace It?
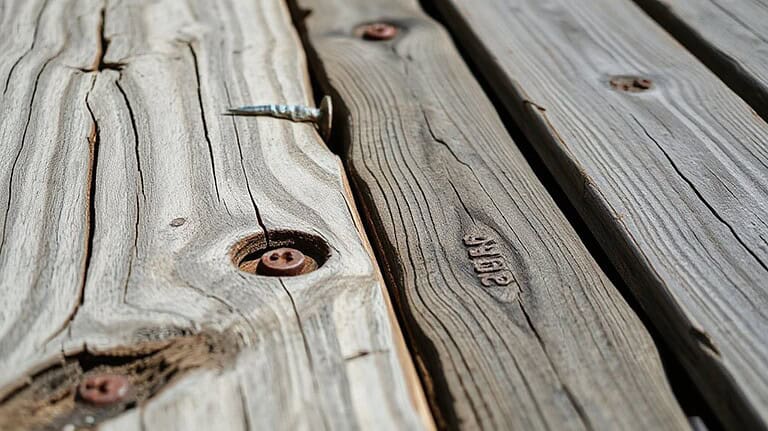
If you’re considering replacing the subfloor under a wall, it’s essential to understand the significance of a subfloor in your home. A subfloor provides stability to your flooring and walls, acting as a solid base beneath the floor covering. Signs that your subfloor may need a replacement include water damage, structural instability, or signs of rot or decay. If left untreated, a damaged subfloor can harm the rest of your flooring, leading to uneven surfaces, squeaks, or even collapse in severe cases. (Learn How Long Do PEX Pipes Last)
Understanding the Importance of a Subfloor
The subfloor is crucial in providing stability to the floor and walls, as it is a solid base beneath the floor covering. When replacing a subfloor under a wall, it’s important to note that it is installed parallel to the wall, while the wall studs are nailed vertically into the subfloor. To replace the subfloor under a wall, you’ll need to cut away a section of the subfloor while ensuring that the fence remains supported.
Now let’s explore signs that indicate your subfloor needs replacement.
Signs that Your Subfloor Needs Replacement
Feeling a slight bounce or sag in your floor? It’s time to check for signs that your trusty subfloor may need some TLC. Here are some indicators that it’s time to replace your subfloor under a wall:
| Signs |
|---|
| Bouncing or sagging floors |
| Cracked tiles or flooring |
| Soft spots or rotting wood |
If you notice any of these signs, you must take action and replace the damaged subfloor. Not addressing these issues can lead to further damage and compromise the stability of your entire flooring system. Now let’s explore the effects of a damaged subfloor on the rest of your flooring.
Effects of a Damaged Subfloor on the Rest of Your Flooring
When your floor starts to bounce or sag, it’s like a warning sign from beneath that something is fundamentally wrong. A damaged subfloor can affect the rest of your flooring and the walls.
Here are some effects of a damaged subfloor on your flooring:
- Uneven or warped flooring
- Cracked tiles or floorboards
- Increased noise and creaking
- Decreased stability and support
To fix these issues, you’ll need to replace the damaged subfloor. But before we get into the tools and materials required for subfloor replacement, let’s first understand how to remove the subfloor under a wall without removing the entire wall itself.
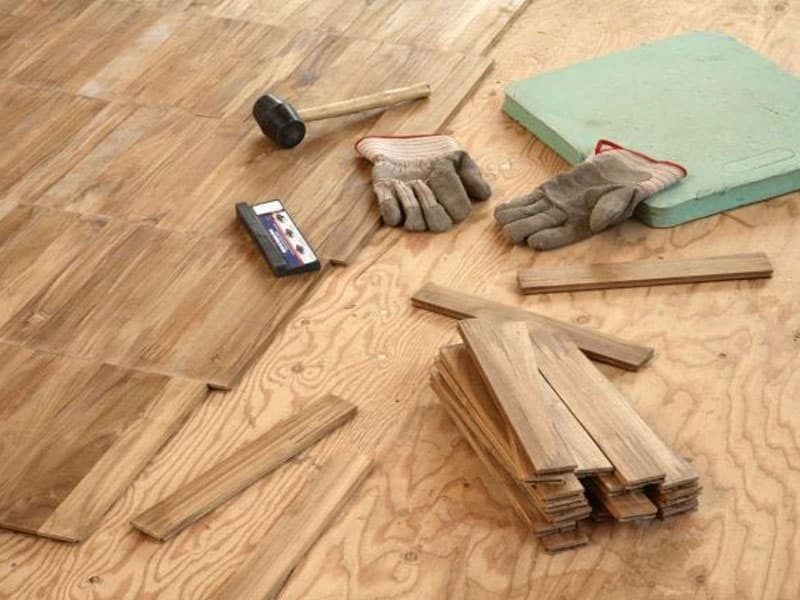
Tools and Materials Needed for Subfloor Replacement
To successfully replace a subfloor under a wall, you’ll need essential tools such as a circular saw, pry bar, utility knife, hand saw, and drill. These tools are necessary for cutting and removing the damaged subfloor and installing the new subfloor.
In addition to tools, you’ll also require materials like plywood or OSB for the new subfloor, screws or nails for securing it in place, and underlayment if needed. Lastly, don’t forget about additional safety gear such as goggles, gloves, and a dust mask to protect yourself during the subfloor replacement.
Essential Tools for Subfloor Replacement
One of the critical aspects of replacing a subfloor under a wall is having the essential tools on hand. When it comes to this task, you’ll need the following devices:
- Circular saw: This tool is crucial for cutting through the subfloor close to the wall.
- Pry bar: Remove the floor covering and baseboard above the subfloor.
- Utility knife: Handy for cutting and removing damaged sections of the subfloor.
Now that you know which tools are necessary to replace a subfloor under a wall, let’s discuss the required materials.
Materials Required for Subfloor Replacement
You will need some materials to tackle this subfloor replacement project under a wall. Get ready to stock up on the essentials! Here’s a list of the materials required for replacing the subfloor:
| Materials | Description |
|---|---|
| Circular Saw | Used to cut the subfloor close to the wall |
| Pry Bar | It helps remove floor covering and baseboard |
| Utility Knife | Useful for cutting and scoring materials |
To successfully replace the subfloor under a wall, you’ll also need a bottom plates removal tool, such as an oscillating multi-tool or reciprocating saw. These tools will help you remove nails from the bottom wall plate without damaging it. Once these materials are ready, you can remove the floor covering and baseboard.
Now that you know what materials are needed to replace the subfloor under a wall, let’s discuss the additional safety gear necessary for this project. In addition to the materials mentioned, wearing safety goggles, a dust mask, and work gloves is essential to protect yourself from potential debris and dust particles during the subfloor replacement. (Read Why Are Flies Attracted To My Deck)
Additional Safety Gear
You’ll need additional safety gear to ensure your protection to replace the subfloor under a wall. Wearing safety goggles and ear protection is crucial when working with power tools like a circular saw. These tools will help you cut through the subfloor close to the bottom wall plate, freeing up the damaged section.
Now that you have your safety gear let’s move on to the step-by-step guide for replacing a subfloor under a wall.
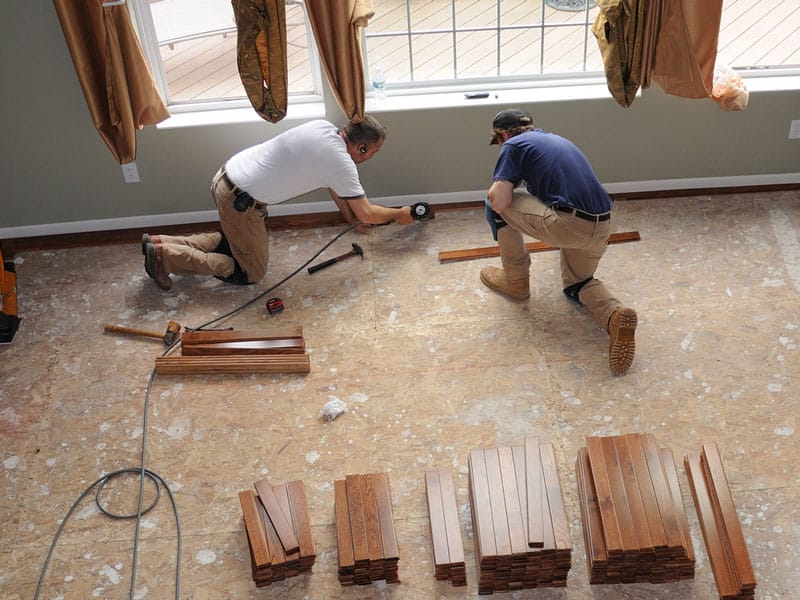
Step-by-Step Guide for Replacing Subfloor Under a Wall
To prepare the area for subfloor replacement, start by turning off electrical circuits and shutting off water lines. Remove baseboards and trim near the subfloor removal area, and be prepared to remove sections of drywall if necessary.
Next, you’ll need to remove the floor covering directly above the subfloor, which may involve cutting or breaking depending on the type of flooring. Once the area is prepped, you can cut and remove the damaged subfloor, install the new subfloor, and finish the entire process by replacing baseboards and floor coverings.
Preparing the Area for Subfloor Replacement
First, turn off the electrical circuits and shut off the water lines before starting the subfloor replacement. This will ensure your safety and prevent any accidents during the process. Use a circular saw to cut as close to the bottom wall as possible. Then, remove the floor covering above the damaged subfloor using a hand saw or other appropriate tools.
Now, you can move on to removing the floor covering and baseboard.
Removing the Floor Covering and Baseboard
Now that you’ve turned off the electrical circuits and shut off the water lines, it’s time to tackle the next step: removing the floor covering and baseboard. Can you imagine how much easier it’ll be to work without those obstacles in your way?
To remove the floor covering directly above the subfloor, remove the baseboard. Then, carefully remove a few more inches of the floor covering and cut only into the luan or underlayment layer. This will allow you to remove part of the subfloor and prepare for cutting and removing the damaged subfloor in the next step.
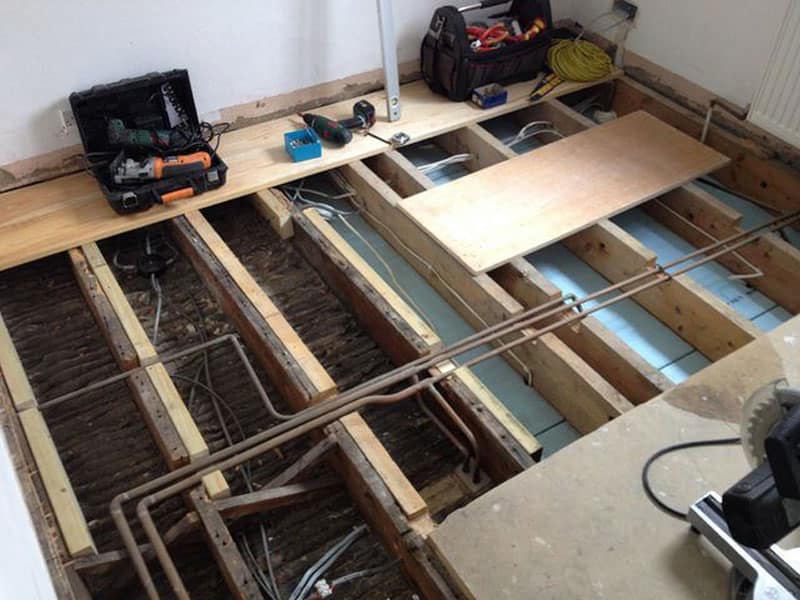
Cutting and Removing the Damaged Subfloor
Once the baseboard and a few inches of the floor covering have been removed, it’s time to tackle the challenging task of cutting out and removing the damaged subfloor. Using a circular saw, set the depth to match the thickness of the subfloor. Carefully cut along the edge of the wall, ensuring no damage to the bottom plate.
Once cut, you can then remove the damaged subfloor section underneath.
This step prepares you for installing the new subfloor in its place.
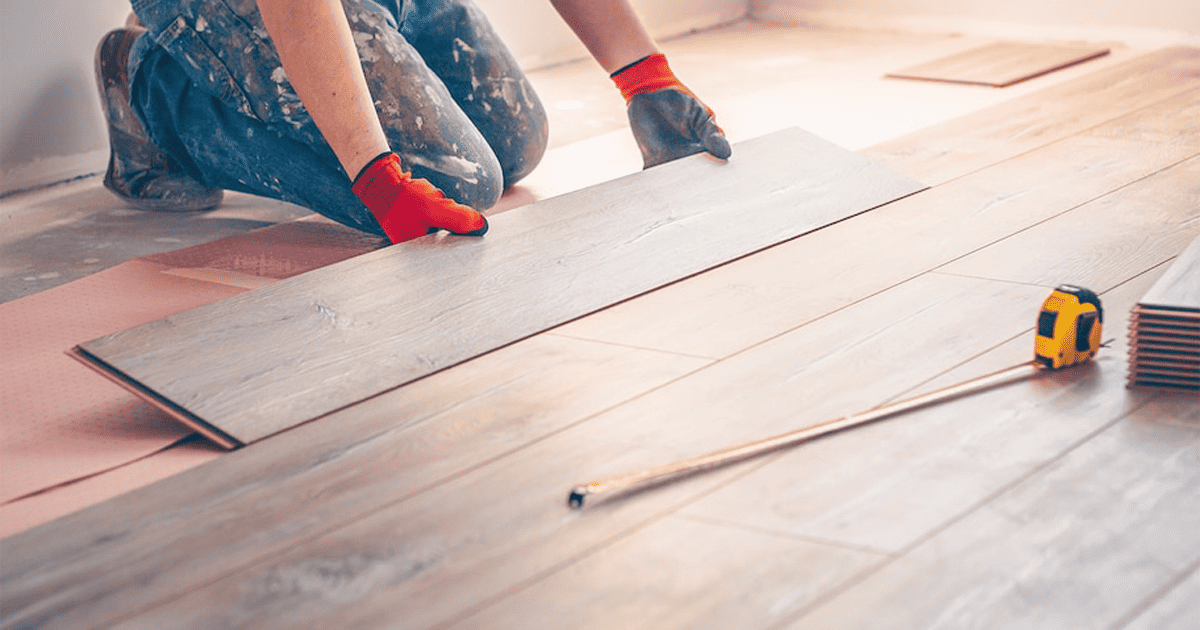
Installing the New Subfloor
To begin the installation, carefully position and secure the new subfloor panel in the designated area, ensuring a snug fit against the existing floor joists. Use a circular saw to cut the subfloor to match the dimensions needed. Ensure it aligns properly with the bottom wall plate and secure it with nails. This will create a solid foundation for your wall and floor.
Once installed, you can finish the subfloor replacement process by following these steps…
Finishing the Subfloor Replacement Process
After securing the new subfloor panel, you can admire the solid foundation supporting your beautiful new flooring and walls.
But before you finish up the subfloor replacement process, there are a few essential steps to take:
- Cut any excess subfloor parts that extend beyond the wall using a circular saw.
- Remove any debris or remaining pieces of the old subfloor trapped underneath the wall.
- Ensure that the edges of the new subfloor are flush with the existing floor.
Now that you’ve finished replacing the subfloor under a wall, it’s time to move on to special considerations for load-bearing walls. (Learn How To Hang A Bear Rug)
Special Considerations for Load-Bearing Walls
When replacing the subfloor under a load-bearing wall, it’s crucial to determine whether it is load-bearing. This can be done by examining the structure and consulting with an engineer or contractor for confirmation. Extra precautions must be taken when replacing the subfloor under a load-bearing wall, such as shoring up the wall and creating a brace underneath the joists. Working with an engineer or contractor with experience in load-bearing wall replacement is highly recommended to ensure safety and structural integrity.
Determining if the Wall is Load-Bearing
Determining if the wall is load-bearing involves examining the structure and stability of the wall to ensure it can safely support the weight above. Replacing the subfloor under a wall can be challenging as it is trapped under the fence. To do this, you’ll need to use a circular saw to cut out the damaged section of the subfloor close to the wall plate. The wall plate is the bottommost part of the wall that is nailed into the subfloor. This process requires precision and caution to avoid damaging the surrounding structure.
Let’s discuss extra precautions for replacing the subfloor under a load-bearing wall…
Extra Precautions for Replacing Subfloor Under a Load-Bearing Wall
Replacing a subfloor beneath a load-bearing wall is like navigating a treacherous tightrope, requiring extra precautions to ensure your home’s structural integrity and safety. Remember that a circular saw can’t cut flush with the border when replacing the subfloor under a load-bearing wall, as the wall plate is nailed into the subfloor and the floor covering. Therefore, you’ll need to carefully remove the remaining section of the subfloor underneath the bottom wall plate.
Remember that the subfloor is a continuous sheet; walls and floors are interconnected, so removing any part of it may affect other areas.
Now let’s discuss working with an engineer or contractor for load-bearing wall replacement.
Working with an Engineer or Contractor for Load-Bearing Wall Replacement
To ensure the structural integrity and safety of your home, it’s essential to enlist the expertise of an engineer or contractor when tackling the replacement of a load-bearing wall. Professional assistance becomes even more crucial when replacing a subfloor under a load-bearing wall.
They’ll have the knowledge and experience to assess the situation correctly, determine the best course of action, and safely remove and replace the subfloor without compromising the wall’s stability. This ensures that your subflooring is replaced correctly and prevents any potential damage to your home’s structure.
Now let’s move on to some tips and tricks for successful subfloor replacement.
Tips and Tricks for Successful Subfloor Replacement
Choosing the suitable subfloor material for your specific needs is essential when replacing a subfloor. This will ensure that your new subfloor is durable and long-lasting. Additionally, you need to provide proper support for the wall and subfloor to maintain structural integrity. Securing the subfloor with screws or nails will prevent movement and potential damage in the future.
It’s also a good idea to waterproof the subfloor for added protection against moisture and potential water damage. If you’re dealing with a complex subfloor replacement, it may be best to hire an experienced professional. (Read Pads To Stop Doors Slamming)
Choosing the Right Type of Subfloor Material
For the best results, you should consider choosing the right type of subfloor material based on your specific needs and preferences. Think of it like selecting the perfect pair of shoes for a long hike – you want something durable, supportive, and comfortable to keep you going strong throughout the journey.
| Subfloor Material | Description |
|---|---|
| Plywood | Durable and commonly used for subfloors. Provides strength and stability. |
| Particleboard | Affordable option but less resistant to moisture. Suitable for low-traffic areas. |
| OSB (Oriented Strand Board) | Healthy and cost-effective choice. Resistant to moisture but may swell if exposed to water for extended periods. |
Choosing the correct type of subfloor material is crucial when replacing a subfloor under a wall because it will determine your flooring system’s overall durability and performance. Selecting a material that can withstand the weight and stress placed upon it is essential, especially in areas with walls.
Replacing a subfloor under a wall can be difficult because the subfloor extends several inches underneath the bottom of the wall. This means that to remove and replace the damaged subfloor, you may need to partially or entirely remove the barrier.
You can maintain structural integrity and prevent potential damage or collapses by ensuring proper support for the wall and subfloor during replacement. The following section discusses providing adequate support for both components during this process without compromising their stability.
Ensuring Proper Support for the Wall and Subfloor
Now that you’ve chosen the perfect subfloor material let’s ensure that both the wall and subfloor get the necessary support for a strong and stable foundation. To replace the subfloor under a wall while providing proper support, follow these steps:
- Install temporary braces to support the wall during the replacement process.
- Use shims to level and align the wall with the new subfloor.
- Securely attach the bottom wall plate to the new subfloor using screws or nails.
- Reinforce the connection between the new subfloor and adjacent floor joists.
With proper support, you can now secure the subfloor to prevent movement and create a durable foundation. Transition: Now that you’ve ensured adequate support for the wall and subfloor, it’s time to focus on securing the subfloor to prevent unwanted movement or cracks.
Securing the Subfloor to Prevent Movement
To ensure a stable and sturdy foundation, it’s time to lock down the subfloor and prevent any wobbles or creaks. When replacing the subfloor under a wall, securing it properly is crucial. Use the following steps to ensure the subfloor and keep it in place:
| Step | Actions |
|---|---|
| 1 | Measure and cut the new subfloor section to fit tightly against the existing floor joists. |
| 2 | Place construction adhesive along the top edges of the floor joists. |
| 3 | Position the new subfloor section on the adhesive, aligning it with the existing subfloor. |
| 4 | Securely fasten the new subfloor to each floor joist using screws or nails. |
| 5 | Repeat these steps for each section of the subfloor that needs replacement. |
Securely fastening the new subfloor, you can ensure a solid foundation for your wall and flooring above. Now let’s move on to waterproofing the subfloor for added protection.
Waterproofing the Subfloor for Added Protection
Securing the subfloor properly is crucial to ensure a stable and sturdy foundation, preventing any wobbles or creaks from occurring. When replacing the subfloor under a wall, keeping it close to the wall is essential.
Here are some critical steps to follow:
- Cut the new subfloor panel to fit snugly against the wall’s bottom plate.
- Use screws to fasten the subfloor without damaging the wall.
- Ensure no gaps exist between the subfloor and the wall to prevent movement or noise.
By waterproofing the subfloor, you can provide added protection against moisture damage. Apply a waterproofing membrane or sealant to the new subfloor before installing any floor covering. This will help prevent water penetration and potential future issues with mold or rot.
Hiring a professional for complex subfloor replacement is essential if you need assistance removing load-bearing walls or tackling extensive repairs beyond securing and waterproofing.
Hiring a Professional for Complex Subfloor Replacement
Consider enlisting the expertise of a seasoned professional when faced with the intricate task of replacing a damaged subfloor beneath load-bearing walls, as their skill and knowledge can provide you with peace of mind and ensure a structurally sound foundation for your home. Hiring a professional for complex subfloor replacement can save you time and effort, especially when dealing with walls that require additional support. They have tools like oscillating and circular saws to efficiently remove the old subfloor and install new materials like vinyl plank flooring or engineered wood.
| Benefits of Hiring a Professional for Complex Subfloor Replacement |
|---|
| Expertise in handling load-bearing walls |
| Efficient use of specialized tools |
| Proper installation techniques |
| Structurally sound results |
By hiring professionals, you can be confident that your subfloor replacement will be done correctly, ensuring the longevity and durability of your flooring system.
Conclusion
To conclude, replacing a subfloor under a wall is a challenging task that requires careful planning and the right tools. You can successfully replace your subfloor by following the step-by-step guide and considering special load-bearing walls considerations.
Remember to ensure proper support for the wall and subfloor, secure the subfloor to prevent movement, and consider waterproofing for added protection. Whether you choose to tackle this project yourself or hire a professional, you can achieve a stable and durable flooring system in your home with the right approach.