Rhododendron Leaves Yellowing: Causes and Fixes
Your rhododendron’s yellow leaves are crying out for help, and it’s usually about soil pH being too high, poor drainage drowning those shallow roots, or nutrient deficiencies like iron and magnesium. You’ll want to test your soil pH (it should be 4.5-6.0), improve drainage with raised beds or compost amendments, and watch for telltale signs like yellow leaves with green veins indicating iron problems. Understanding these specific symptoms will reveal the secrets to restoring your plant’s lively health.
TLDR
- Soil pH outside the ideal 4.5-6.0 range causes nutrient deficiencies, leading to yellow leaves with poor iron uptake.
- Overwatering and poor drainage create waterlogged conditions that stress roots and cause yellowing leaves with mushy roots.
- Iron deficiency shows as yellow leaves with dark green veins on new growth tips (interveinal chlorosis).
- Magnesium deficiency causes older leaves to yellow from the center with green margins remaining intact.
- Pest infestations from azalea lace bugs and spider mites create yellow stipples and bronze discoloration on leaves.
Understanding Soil Ph Requirements for Healthy Rhododendrons
When you’re out exploring those gorgeous mountain trails and stumble upon wild rhododendrons blooming like nature’s own fireworks display, you might wonder why these beauties sometimes look a bit yellow and sad in home gardens. Trust me, after years of camping in rhododendron country and trying to recreate that magic at home, I’ve learned it usually comes down to one sneaky culprit: soil pH! The ideal growing conditions require a pH between 4.5 and 6.0 to keep these acid-loving plants thriving in your landscape. Regular soil pH testing can help ensure that these plants receive the nutrients they need for vibrant growth.
Identifying Iron Deficiency and Interveinal Chlorosis
When you’re out exploring nature trails or setting up camp near those gorgeous rhododendron gardens, you might notice something peculiar about yellowing leaves that’ll make you stop and investigate further.
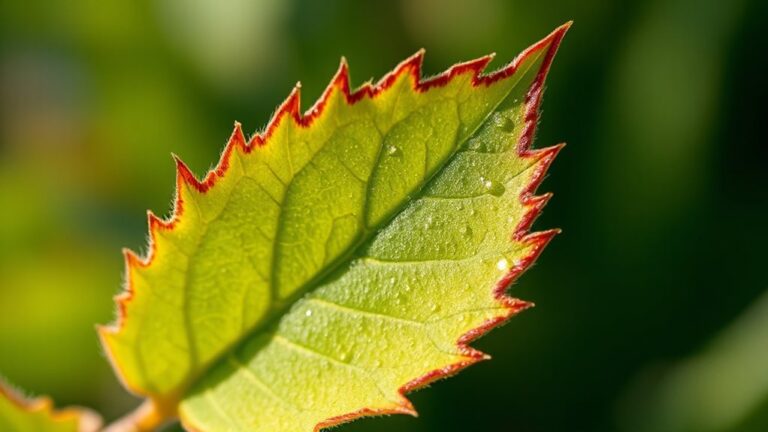
If you spot bright yellow leaves with dark green veins creating a striking pattern—especially on the newest growth at branch tips—you’re likely witnessing iron deficiency, which is like your plant’s way of waving a yellow flag for help!
This interveinal chlorosis, as garden experts call it, often develops when alkaline soil conditions lock up the iron that’s already present in the ground, making it as unavailable to your rhododendrons as a locked snack cabinet is to a hungry camper. In severe cases, you’ll notice the veins lightening and brown spots developing on the affected leaves, signaling that your plant’s distress has reached a critical stage. To effectively treat this condition, consider using balanced NPK fertilizer to provide essential nutrients that promote healthy growth.
Iron Deficiency Symptoms
If you’ve noticed your rhododendron’s newest leaves turning yellow while the veins stay stubbornly green, you’re likely looking at iron deficiency – and trust me, it’s one of those sneaky plant problems that can drive even experienced gardeners a bit crazy!
This interveinal chlorosis spreads downward, eventually causing leaves to drop prematurely.
Alkaline Soil Effects
Although iron might be sitting right there in your soil like a locked treasure chest, alkaline conditions act like that stubborn key that just won’t turn – and this is exactly why your rhododendron’s leaves are putting on their yellow distress signal!
When soil pH climbs above 7, iron becomes basically invisible to your plant’s roots, creating that telltale interveinal chlorosis you’re seeing.
Treatment and Solutions
Three telltale signs will help you crack the case of iron deficiency faster than you can set up camp on a weekend getaway – and trust me, you’ll want to play detective here because misdiagnosing this problem is like trying to traverse a trail with the wrong map!
Look for yellowing new leaves with green veins, pale areas between veins, and symptoms starting at branch tips.
Recognizing Magnesium Deficiency Symptoms
If you’ve ruled out iron deficiency but you’re still seeing that frustrating yellowing between the leaf veins, it’s time to check for magnesium deficiency, which sneakily targets your rhododendron’s older leaves first—kind of like how I always pack my oldest camping gear at the bottom of my backpack and forget about it until it’s too late!
The key difference you’ll notice is that magnesium deficiency creates those telltale yellow patches that start in the center of older leaves and can progress to brown, necrotic spots, while iron deficiency typically shows up on younger growth with a more uniform yellowing pattern. It’s also worth noting that overwatering can lead to browning in other plants, so ensuring proper watering habits can help prevent similar issues in your rhododendron.
The good news is that once you’ve correctly identified magnesium as the culprit, you can treat it with targeted solutions like Epsom salt applications, which work faster than setting up camp in a thunderstorm—and trust me, I’ve been there!
Older Leaves Turn Yellow
When you’re out camping and notice your beloved rhododendrons looking less than stellar with their older leaves turning a telltale yellow, you’re likely witnessing magnesium deficiency in action – and trust me, I’ve seen this happen to countless outdoor enthusiasts who thought they were doing everything right!
The yellowing spreads between veins while margins stay green.
Distinguishing From Iron Deficiency
Now here’s where things get tricky for us outdoor enthusiasts – magnesium and iron deficiencies can look surprisingly similar at first glance, but once you know what to look for, you’ll spot the differences faster than you can set up camp!
Magnesium deficiency hits older leaves with center yellowing, while iron deficiency targets young leaves with distinct yellow veins.
Targeted Magnesium Treatment Options
Before you pack up your gardening gear and head back inside thinking your rhododendron’s yellowing leaves are a lost cause, you’ll want to become a detective and learn to spot the telltale signs of magnesium deficiency – it’s like reading trail markers on your favorite hiking path, once you know what to look for!
Proper Watering Techniques to Prevent Root Stress
Since rhododendrons develop those shallow, fibrous root systems that spread out like a web just beneath the soil surface, you’ll need to hone your skills in the art of watering these beauties properly if you want to avoid that dreaded yellowing that makes your garden look less than stellar.
Water deeply in mornings, maintain consistent moisture without waterlogging, and use drip irrigation systems.
Improving Soil Drainage and Preventing Waterlogged Conditions
You’ll know your rhododendron’s dealing with drainage issues when you spot yellowing leaves starting from the bottom up, musty soil odors that remind me of that time our tent got soaked during a camping trip in Oregon, and roots that look brown and mushy instead of healthy white.
Creating raised beds becomes your best friend here – just like setting up camp on higher ground to avoid those midnight puddles, you’ll want to build up your planting area about 12-18 inches above the surrounding soil using timbers or stones for support.
The real turning point, though, is amending that heavy clay soil with equal parts compost and chunky peat moss, which works like magic to create the loose, crumbly texture your rhododendron’s shallow roots absolutely crave for proper oxygen flow.
Signs of Poor Drainage
When your rhododendron’s leaves start turning that telltale yellow color, there’s a good chance you’re dealing with poor drainage issues that can turn your beautiful garden centerpiece into a soggy, stressed-out mess.
You’ll notice the soil stays waterlogged after rain, roots turn dark brown and mushy, and shoots start wilting—classic signs your plant’s drowning!
Creating Raised Beds
Although your rhododendron might be crying out for help with those yellowing leaves, creating a raised bed can be your garden’s superhero solution that literally lifts your plant above its waterlogged troubles!
Build beds 18-24 inches deep using cedar boards, fill with 60% topsoil and 30% compost, then watch drainage magic happen!
Soil Amendment Techniques
Now that you’ve got your raised bed game strong, let’s talk about the secret sauce that makes those lifted planters actually work their magic – the soil amendments that’ll change your heavy, waterlogged dirt into a rhododendron paradise!
Mix coarse sand, gravel, and compost into your top 6-8 inches for killer drainage.
Combating Azalea Lace Bug Infestations
If you’ve ever noticed your beautiful rhododendrons looking like they’ve been attacked by tiny vampires, leaving behind a constellation of yellow stipples and mysterious black spots, you’re likely dealing with the sneaky azalea lace bug – and trust me, these little troublemakers can turn your dream garden into a camping nightmare faster than you can say “s’mores!”
Managing Spider Mite Damage and Detection
While those azalea lace bugs might seem like your rhododendron’s biggest enemy, there’s another microscopic menace lurking in your garden that’s even sneakier – spider mites, those nearly invisible sap-suckers that’ll turn your gorgeous green leaves into a sad display of yellow, bronze, and stippled disaster faster than you can pack your camping gear for a weekend getaway!
Environmental Factors That Cause Leaf Yellowing
Beyond those pesky little critters we just talked about, your rhododendron’s yellowing leaves might actually be crying out for help because of environmental conditions that are making life absolutely miserable for your beautiful shrub – and trust me, I learned this the hard way when I returned from a fantastic camping trip in the Smoky Mountains only to find my prized rhododendron looking like it had been through its own wilderness survival challenge!
Seasonal Leaf Drop vs. Problematic Yellowing
When you’re staring at those yellow leaves on your rhododendron and wondering whether you should panic or just grab a cup of coffee and relax, understanding the difference between normal seasonal leaf drop and actual problems can save you from unnecessary worry – and trust me, I’ve spent way too many sleepless nights fretting over perfectly healthy plants!
Fertilization Strategies for Nutrient-Deficient Plants
Just like packing the right gear for a camping trip can make or break your outdoor excursion, choosing the correct fertilization strategy for your nutrient-deficient rhododendron will determine whether you’ll be celebrating healthy green foliage or scratching your head at more yellow leaves next season!
Apply balanced fertilizers in late winter, supplement iron with chelated products for chlorosis, and always test soil pH first to guarantee proper nutrient uptake.
Long-Term Care Practices for Prevention
While getting your fertilization game plan dialed in will definitely help your rhododendron bounce back from those frustrating yellow leaves, think of long-term prevention strategies as setting up base camp for a successful multi-day backpacking expedition – you’re planning ahead to avoid problems before they even show up on the trail!
Consistent monitoring, proper pruning after flowering, and maintaining excellent drainage create your foundation for healthy plants.
Overall
You’ve now got all the tools to turn those yellowing rhododendron leaves back to lively green! Remember, it’s usually about getting that soil pH just right, fixing drainage issues, or adding the nutrients your plant’s craving. Don’t panic if you see some natural seasonal dropping – that’s totally normal. With consistent care and a bit of patience, you’ll have gorgeous, healthy rhododendrons that’ll make your neighbors seriously jealous of your gardening skills!