How Long to Run Water After Shut Off
You may wonder, like a ship without a sail, how long to run water after a water main break. Well, don’t worry – we’ll have you back on course soon! Running the water for an appropriate amount of time is essential to ensure clean and safe water for all, so it’s important to know what steps should be taken.
From opening the main valve to flushing out any accumulated debris in your pipes, this article will explain everything you need to know about how long to run water after a water main break. So sit tight and prepare for an informative journey that will get you up-to-speed with running your household’s tap water safely and efficiently.
What is the main reason for running water after shut off?
You need to run water after a shut-off for several reasons.
- One reason is pipe flushing. This helps to remove any built-up sediment or debris that may be present in the pipes.
- Another reason is for water heater and hot/cold water fixture maintenance. Running water helps to prevent mineral buildup and keeps the system functioning correctly.
- Regulating valves and plumbing repairs also require running water. This is done to ensure the valves are working correctly and to test for leaks or issues in the plumbing system.
- Running water is also essential for backflow prevention. By running water, you can help to prevent any contaminated water from flowing back into the main water supply.
- Sewer system maintenance is another reason for running water after a shut-off. This helps keep the sewer lines clear and prevents blockages or backups.
- Lastly, running water is necessary to operate your home water system. It helps to regulate water pressure and ensure the proper functioning of all fixtures and appliances.
- In addition to these reasons, running water also helps to maintain the quality of your tap water. It keeps water softeners active and eliminates any stagnation that could lead to contamination. (Learn How Long For Spackle To Dry)
Water Main Break or Pipe Flush
After a water main break or pipe flush, it is essential to flush the plumbing fixtures before resuming operations to ensure the water’s quality and integrity. To do this:
- Run hot and cold water pipes for at least 10 minutes each.
- Start from the outlet farthest from the service connection.
Let the water flow for 5-10 minutes before closing the faucets.
Dispose of old ice and flush the ice maker with fresh water.
Replace filters to prevent bacterial growth.
A properly flushed system can help protect against contaminants like Legionella and other pathogens and leaching metals that could be harmful if ingested or used in food preparation.
Hot and cold water pipes need to be cleared of particulates, so ensure all valves are open during flushing and adjust back after completion.
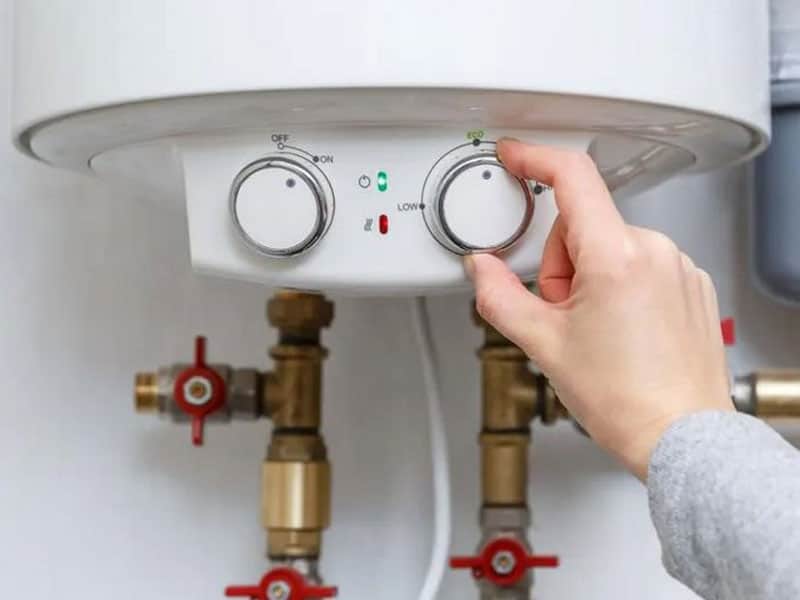
Water Heater and Hot and Cold Water Fixtures
Flushing hot and cold water fixtures and your water heater is crucial to maintaining the quality of your home’s water supply. To do so, follow these steps:
- Open the Hot Water Outlet Pipe and Cold Water Inlet Pipe valves fully.
- Turn on all hot water taps in your home until they run continuously for five minutes.
- Afterward, turn off the Hot Water Tank power switch or gas valve.
- Drain the water heater altogether.
- Please fill up the tank and return it to its original state.
Following these steps, you ensure that any sediment buildup from a water main break or pipe flush has been cleared away from your Hot Water Supply Tap.
Valves, Plumbing Repairs, and Water Pressure Regulation
Maintaining your home’s valves, plumbing repairs, and water pressure regulation is essential for a functioning water system. Over 90% of all homes have at least one valve! To turn off the water supply of any fixture or appliance, you’ll need to locate the main shutoff valve. If you’re doing some plumbing repairs, don’t forget to shut off the water before you start.
Once it’s time to turn on the water again after repair, open up the main shutoff valve slowly and check for leaks; if there are no issues, gradually increase the pressure until it returns to normal. Following these steps will help ensure your home’s plumbing system functions correctly and efficiently.
Backflow Prevention, Sewer, and Home Water System
Protecting your home’s water system from contamination is essential, starting with backflow prevention. To keep your water safe, you should follow these steps:
- Install a cold water inlet valve.
- Locate the water meter closest to the street.
- Put a shutoff valve at the main water valves.
To begin the process, open a faucet to release any pressure buildup. Then, turn off all of the main valves. Afterward, check for leaks and repair or replace any faulty valves. Finally, flush out the pipes before turning on the cold water inlet valve again.
By following these steps, you can ensure clean and safe drinking water every time! (Learn How To Stop Water Pooling On Decking)
Water Quality, Water Softener, Lowest Level of Usage
Ensuring optimal water quality starts with maintaining a water softener and using the lowest possible usage. This is especially important for long-term use of electricity or gas-powered water heaters, which should be used at the lowest level to prevent air from getting trapped in the water supply pipes.
To ensure that your home has an adequate flow of cold water lines, check for any leaks near the base of electric water heaters and repair them if necessary. Additionally, it is recommended to flush out all your cold water lines by opening a faucet on the lowest level of your home for several minutes before turning on any other fixtures.
This will help remove air from the pipes and ensure that all levels get a steady fresh water supply.
How long does it take for the water to shut off?
Turning on the cold water tap or faucet is essential before shutting off the main valve. This helps block the flow of water. Let the water run for a few minutes to ensure that all air pockets are removed from the system. Allow it to flow freely. Once this is done, you can drink the tap water with confidence. You will know that it has been adequately flushed and cleared.
Turning on the Cold Water Tap or Faucet
To ensure proper water flow after turning it back on, always turn off all faucets except for the top floor tub or sink and partially open valves slowly for lever handles. When turning on the cold water tap or faucet, it is essential to start at the side of the water meter closest to your home and then move to the lowest faucet in your home. This will help reduce any drop in water pressure and prevent air from entering your water pipes.
Here are a few tips when turning on cold water:
- Start at the side of the meter closest to your home
- Move onto the lowest faucet in your home
- Open valves slowly for lever handles
- Monitor closely for any drop in pressure

Main Shutoff Valve – Turning the Water Back On
Now that the cold water tap or faucet is turned off, it’s time to turn on the main shutoff valve. This valve will provide hot and cold water to the electric tank water heater and the home’s fixtures. Let the water run for a few minutes before turning off any other taps or faucets to ensure everything works correctly. Ensure water is in the tank by waiting approximately 10 minutes after turning on the main shutoff valve.
Finally, check for any leaks at all fixtures, including your electric tank water heater, before leaving them running again.
Main Valve – Blocking the Flow of Water
Shutting off the main valve is crucial to block the water flow in your house and prevent any unwanted spills. You’ll need to locate the main water line outside your home and shut off the valve to do so. The valve is usually clearly labeled, but if not, you may have to consult a plumber for help. When turning it off, turn all faucets in your house off first so that no air gets into the water lines when you close the main valve.
Afterward, fill or flush each fixture until all are running clear with no air bubbles. This will ensure that everything runs smoothly when you turn on your faucets after opening up the main valve again. (Learn How To Connect Two Garden Hoses)
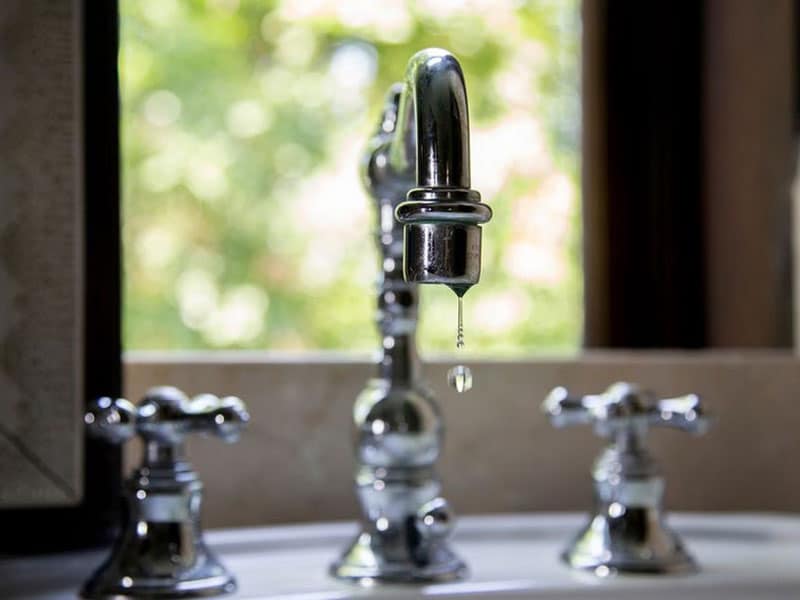
Let the Water Run – Allow the Water to Flow Drinking Tap Water
Let the tap water run for a few minutes before drinking it, as it helps flush out any leftover residue or contaminants in the pipes. Gallons of water pour through our plumbing daily, so it is essential to turn on the tap and allow the water to flow for at least two minutes before drinking it. This helps ensure that any sediment or other impurities are flushed from the pipes, resulting in cleaner and safer water.
| Action | Time |
|---|---|
| Turning on the Water | 10-15 seconds |
| Allowing Water to Run | 2-3 minutes |
| Closing Tap | 10-15 seconds |
Doing this small task whenever you need tap water can help avoid potential health risks associated with ingesting contaminated liquids. Drinking clean and safe tap water is an easy way to stay healthy, so always flush your plumbing system with fresh running water before taking a sip!
What should I do if my main water valves are turned off?
If your main water valves have been turned off, it’s essential to take the necessary steps to shut off the main supply of water. This can help prevent flooding and costly repairs. To start, locate the main valve, which is typically near the water meter or curb stop. Once you’ve found it, turn off the main valve completely. This will stop the flow of water into your home.
Next, it’s crucial to close all faucets in your home. This step ensures no water flows through your system, preventing any potential leaks or further damage. Following these steps, you can effectively deal with the situation if your main water valves are turned off. Remember, it’s always a good idea to consult a professional plumber if you’re unsure or need assistance.
Turning Off the Main Valve – Shutting Off the Main Supply of Water
To protect your home from water damage, turning off the main valve and shutting down the main water supply if a water main break occurs is crucial. This will help prevent further damage and ensure that repairs or replacements can be done safely.
Here are the steps to follow:
- Turn off gas tank water heaters.
- Know local moratoriums against utility cutoffs.
- Turn the water back on slowly, opening all taps for full pressure.

Turning Off the Ball Valve – Controlling Your Home’s Hot & Cold Water Supply Line Water Meter
If you’ve recently turned off the ball valve to your home’s hot and cold water supply line, it’s essential to take a few extra steps before turning it back on.
First, you should let the residual pressure out of the lines. This can be done by opening a faucet or valve at the lowest point in your home, such as a basement sink or outdoor fixture. Doing this release any built-up pressure and prevent potential damage to your plumbing system.
Next, it’s a good idea to flush out the lines to ensure clean water flow. Turn on each faucet one by one and let the water run for a few minutes. This will help remove any stagnant water or debris that may have accumulated while the valve was shut off.
Lastly, you should check for any sediment that may have settled in the pipes. This can be done by removing the aerator from each faucet and inspecting it for debris. If you notice any sediment, clean the aerator thoroughly before reattaching it.
By following these steps, you can ensure that your home’s water supply is safe and reliable when you turn the ball valve back on. Taking the time to flush out your pipes can help prevent costly repairs in the future and keep your family safe. (Learn How Long Do Roses Last)
Letting The Residual Amount Of Pressure Out, Flushing The Lines
After a water main break, it is essential to let the residual pressure out and flush the lines. To ensure your system is free of contaminants, flush all faucets in the same order that you turned them off when shutting off the ball valve handle.
After a period without water use, flush your system for at least 10 minutes. This will allow new, clean water to flow through your pipes and fixtures. Start with the outlet farthest from the service connection and leave each institution running for 5 minutes before moving on. Flushing the lines will help eliminate stagnant water that could compromise water quality and lead to illness.
Clean Out The Pipes – Removing Sediment From Your Pipes
Removing sediment from your pipes is essential in maintaining water quality and preventing potential clogs. After a water main break, your home’s access to cold water faucets should be checked to see if they are running clear before flushing the building water systems.
To do this, follow these steps:
- Open the kitchen sink base cabinet and turn off the valve inside.
- Turn on each faucet one at a time until all are flowing with clear water.
Doing this will help ensure that no sediment has built up and is clogging the pipes, which could cause problems. If any faucets have low-pressure or discolored water, it may be necessary to flush out and clean those pipes too.
Remember always to take safety precautions when accessing any of your home’s plumbing systems!

Getting Rid Of Any Accumulated Debris In Your Pipes
Checking leaks is essential in maintaining your home’s hot and cold water supply lines. Ensure there are no leaks by regularly inspecting all pipes, faucets, and fixtures. If you discover any issues with these components, it’s essential to take the necessary steps to repair them quickly to avoid further damage.
Another crucial aspect of maintaining your pipes is removing any accumulated debris. Over time, debris such as hair, soap scum, and food particles can build up in your pipes, leading to clogs and blockages. To prevent this, regularly clean your drains using a drain cleaner or a mixture of baking soda and vinegar. Pour the solution down the drain, let it sit for a while, and then flush it with hot water. This will help remove any debris and keep your pipes clear.
If your drains are still slow or clogged, you may need to use a plumbing snake or a plunger to remove the blockage. These tools can help dislodge any stubborn debris and restore proper water flow. In addition to cleaning your drains, it’s also a good idea to flush your pipes with hot water regularly. This can help remove any built-up residue and keep your lines in optimal condition.
By regularly checking for leaks and getting rid of accumulated debris, you can ensure that your pipes remain in good working order and avoid costly plumbing repairs.
Check For Leaks – Making Sure There Are No Leaks In Your System
After restoring your water, checking for leaks in your system is essential. Here’s how you can do it:
- Start by checking the cold water feed. Leave the faucet on and turn off the valve. This will help you determine if there are any leaks.
- Inspect all the pipes for any signs of dampness or water damage. This can indicate leaks that have occurred over time.
- If everything looks good, turn the valve back on and let the faucet run for a few minutes. This will help flush out any remaining air or debris in the system.
- Once you are confident there are no leaks, and the system works correctly, turn off the faucet.
By following these steps, you can ensure no leaks in your system and enjoy restored water without any unexpected issues.
Conclusion
It’s essential to run the water for at least 10 minutes after a water main break to ensure it is safe and of good quality. Flushing showerheads, screens, filters, and aerators will help make sure any potential pathogens are gone.
Remember: An ounce of prevention is worth a pound of cure – don’t wait until it’s too late! Taking the time to flush out your pipes properly will ensure you have clean drinking and bathing water for years.