How to Grow Oyster Mushrooms at Home
You can easily grow oyster mushrooms at home by pasteurizing straw or coffee grounds as your substrate, then mixing in grain spawn at a 5-10% ratio in a plastic bag. Keep your setup in darkness at 22-24°C with 80-90% humidity until white mycelium threads appear, which takes about 1-2 weeks. Once colonized, introduce light and fresh air exchange to trigger fruiting, and you’ll harvest clusters in just days – stick around to perfect the complete step-by-step process.
TLDR
- Choose straw as your substrate for optimal growth, as it’s affordable and rich in cellulose that oyster mushrooms need.
- Pasteurize your substrate using heat or steam to eliminate harmful microorganisms before inoculation with mushroom spawn.
- Mix sawdust spawn into substrate at 5-10% ratio, then incubate in darkness at 22-24°C with 80-90% humidity.
- Provide fruiting conditions of 59-77°F, 85-95% humidity, fresh air exchange, and light to trigger mushroom formation.
- Harvest when caps curl uniformly, then soak blocks 12-24 hours in cool water for multiple flushes.
Understanding Oyster Mushrooms and Their Benefits
While you might think mushrooms are just those bland, rubbery things your parents tried to sneak into your spaghetti sauce, oyster mushrooms are actually remarkable organisms that’ll completely change your mind about fungi!
These astounding decomposers pack serious nutritional punch with protein, fiber, and immune-boosting compounds, plus they’re incredibly easy to grow at home! Unlike many seasonal mushrooms, oyster mushrooms are available year-round, making them perfect for continuous home cultivation. Additionally, native plants can be used in your garden to create a balanced ecosystem that supports mushroom growth.
Essential Equipment and Materials for Home Cultivation
You’re about to set off on an exciting mushroom-growing journey, and just like packing the right gear for a camping trip, having the proper equipment will make all the difference between a successful harvest and a frustrating failure!
The three essential categories you’ll need to master are selecting and preparing the perfect substrate (think of it as creating a cozy bed for your mushroom spawn to sleep in), gathering the right spawn and inoculation tools to get your oyster mushrooms started, and setting up environmental control equipment that’ll keep your fungal friends as happy as campers around a warm fire. For optimal results, you’ll want to maintain humidity levels between 80-90% RH during the fruiting stage when your mushrooms are ready to emerge. Additionally, using compost and organic matter in your substrate can provide essential nutrients that promote healthy mushroom growth. Trust me, I learned this the hard way when my first attempt failed miserably because I skipped the thermometer and ended up with moldy disappointment instead of delicious oyster mushrooms!
Substrate Selection and Preparation
Once you’ve decided to plunge into the exciting world of oyster mushroom cultivation, selecting and preparing the right substrate becomes your most critical foundation step—think of it as choosing the perfect campsite for your fungal friends to thrive!
Straw’s your best buddy here, being affordable and nutrient-packed, while coffee grounds work wonderfully for smaller setups after proper pasteurization.
Spawn and Inoculation Tools
After you’ve got your substrate sorted out like a well-organized camping trip, gathering the right spawn and inoculation tools becomes your next expedition in the fascinating world of mushroom cultivation!
You’ll need grain spawn (think sterilized rye or wheat berries), a pressure cooker for sterilization, alcohol wipes for sanitation, and plastic bags with filter patches—basically creating your own mushroom laboratory quest!
Environmental Control Equipment
While your oyster mushrooms might seem like low-maintenance camping companions, they’re actually quite particular about their environmental conditions—think of them as those friends who need the tent temperature just right, the humidity perfectly balanced, and absolutely no direct sunlight hitting their sleeping bags!
You’ll need digital thermometer/hygrometer combos, heat mats with thermostats, ultrasonic humidifiers, and 6500K LED bulbs for success.
Selecting and Preparing Your Growing Substrate
Now that you’ve got your equipment ready, it’s time to pick the perfect “bed” for your oyster mushrooms to grow in – and trust me, these fungi are way pickier about their sleeping arrangements than you were on that camping trip where you forgot your sleeping pad!
You’ll want to choose from materials like straw, cardboard, coffee grounds, or sawdust pellets, with straw being the champion choice since it’s cheap, easy to find, and oyster mushrooms absolutely love munching on its cellulose-rich fibers.
Once you’ve selected your substrate, you’ll need to pasteurize it using hot water or a lime solution to kick out any unwanted microorganisms that might crash your mushroom-growing party, because nobody wants moldy competition ruining the fun. Remember, using the correct substrate is crucial for garden health and optimal mushroom growth.
Choosing Optimal Substrate Materials
Foundation materials make all the difference when you’re setting up your oyster mushroom growing expedition, and honestly, picking the right substrate feels a bit like choosing the perfect campsite – you want something that’ll provide everything your fungi friends need to thrive!
Straw’s your budget-friendly superstar, while hardwood sawdust from oak or acacia delivers premium results.
Pasteurization and Sterilization Methods
Once you’ve got your substrate picked out, it’s time to tackle what I like to think of as the “great cleanup mission” – pasteurization and sterilization – because just like you wouldn’t pitch your tent in a campsite crawling with unwanted critters, you can’t let your mushroom substrate harbor nasty bacteria and competing molds that’ll crash your fungi party!
Pasteurization and Sterilization Techniques
Before you can successfully grow those delicious oyster mushrooms you’ve been dreaming about, you’ll need to tackle one of the most essential steps in the entire process: properly pasteurizing or sterilizing your growing substrate to eliminate nasty contaminants that could ruin your entire harvest.
You’ve got several proven techniques to choose from, including autoclave sterilization, tunnel pasteurization, and chemical methods.
Obtaining and Handling Mushroom Spawn
Now that you’ve got your growing medium perfectly sterilized and ready to go, it’s time to get your hands on some high-quality mushroom spawn – think of it as the “seeds” that’ll convert your prepared substrate into a thriving mushroom garden that’s way more exciting than any camping trip you’ve ever taken!
You’ll want sawdust spawn for beginners.
Inoculation Methods and Best Practices
With your spawn ready and your substrate perfectly prepped, you’re about to plunge into the most essential step of your mushroom-growing expedition – inoculation, which is basically introducing your spawn to its new substrate home where it’ll spread like wildfire and eventually reward you with delicious oyster mushrooms!
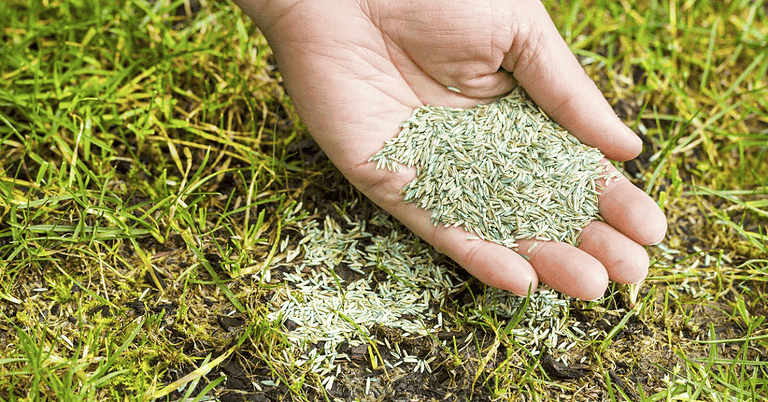
Mix that spawn thoroughly throughout your substrate, aiming for about 5-10% spawn-to-substrate ratio for ideal results.
Creating Optimal Incubation Conditions
Once you’ve successfully inoculated your substrate, you’ll need to create the perfect cozy environment for your oyster mushroom mycelium to colonize and thrive – think of it like setting up the ultimate camping basecamp where everything’s just right for your fungal friends to spread their underground network!
Keep temperatures between 22-24°C, maintain 80-90% humidity, guarantee complete darkness, and provide gentle air circulation for ideal colonization.
Monitoring the Colonization Process
After your mushroom spawn has settled into its cozy substrate home, you’ll become a bit like a nature detective, carefully watching for the telltale signs that your oyster mushroom mycelium is spreading its underground magic throughout the growing medium!
Look for white, cottony threads creeping across your substrate’s surface, which signals successful colonization is happening.
Transitioning to Fruiting Stage
Once your oyster mushroom substrate shows complete colonization with that beautiful white mycelium coverage, it’s time to change gears and create the perfect environment for those tiny pins to emerge and grow into delicious mushrooms!
You’ll need to lower the temperature to around 20°C, crank up the humidity to about 90%, and introduce some gentle lighting to signal your fungi friends that it’s showtime.
Think of this shift like setting up the perfect camping conditions – just as you’d adjust your tent’s ventilation, manage moisture levels, and position your setup for ideal light exposure, your mushrooms need that same careful attention to temperature, humidity, and illumination to fruit successfully.
Optimal Fruiting Conditions
Getting your oyster mushrooms ready to fruit is like setting up the perfect campsite – you need just the right combination of temperature, humidity, and fresh air to create that magical environment where tiny mushroom pins will suddenly appear like morning dew on your tent!
You’ll want temperatures between 59-77°F, humidity around 85-95%, and fresh air exchange every ten minutes.
Light and Ventilation
Now that you’ve got your temperature and humidity dialed in perfectly, your oyster mushrooms are basically sitting in their tent waiting for the sunrise – and just like you need that morning light to know it’s time to crawl out of your sleeping bag, your mushrooms need light to start forming those beautiful caps we’re all excited to harvest!
Humidity Management Techniques
The magic really happens when you conquer humidity control during the fruiting stage, because this is where your oyster mushrooms evolve from tiny little pins into those gorgeous, meaty caps that’ll make your friends think you’re some kind of mushroom wizard!
You’ll need to maintain 85-95% humidity using ultrasonic humidifiers, water trays, and careful misting.
Harvesting Your Oyster Mushrooms
After all your careful tending and patient waiting, you’ll feel that familiar rush of excitement when your oyster mushrooms finally reach their perfect harvest window – much like spotting the ideal campsite after hours of hiking through the wilderness!
Look for curled caps with uniform color, then gently twist clusters upward with clean hands for the cleanest harvest possible.
Maintenance and Multiple Flush Production
Congratulations, you’ve just experienced the thrill of your first harvest, but here’s where things get really exciting – your oyster mushroom expedition isn’t over yet!
With proper maintenance, you’ll get multiple flushes from the same substrate. Keep humidity around 90%, provide adequate air exchange, and after each harvest, soak your block in cool water for 12-24 hours to trigger the next flush.
Overall
You’ve now got all the tools to change your kitchen into a mini mushroom farm, and trust me, there’s nothing quite like the satisfaction of harvesting your first cluster of plump, fresh oyster mushrooms! Once you’ve perfected this process, you’ll be amazed at how quickly these beauties grow, and you’ll probably find yourself checking on them obsessively like I do. Happy growing, and enjoy those delicious homegrown mushrooms!