DIY Lay Box for Your Bearded Dragon
Grab a 12‑gallon Rubbermaid tote, cut a rounded 1‑2‑inch entry on the cool side, smooth the edges with a soldering iron, and slip a 4‑inch‑high tub edge inside for a ramp; mix 70 % play sand, 30 % organic topsoil and a splash of excavator clay, moisten until it clumps like a sandcastle, then pack it to 10 inches and test the firmness; place a 7‑32 W heat mat under a slate slab and a foil sheet, set a pulse‑proportional thermostat, keep humidity at 30‑50 % and watch for belly‑swelling, frantic digging, and beard‑flaring cues—once you’ve got the basics down, the next steps will show you how to fine‑tune moisture, troubleshoot soggy substrate, and keep the box spotless for future layings.
TLDR
- Choose a sturdy 12‑gal (tiny), 18‑gal (medium), or 20‑gal+ (adult) plastic tote, cut a 1‑2 in. entry hole, and round the rim for safety.
- Fill the box with a 70 % play sand, 30 % organic topsoil mix, add excavator clay, and pack to 10 in. depth, adjusting moisture until sand‑castle clumps hold together.
- Place a 7‑32 W heat mat beneath an aluminum sheet and slate slab, cover with insulated rofoam, and regulate temperature with a pulse‑proportional thermostat and wall sensor.
- Attach a 20‑degree wooden ramp sealed with silicone, position the box on the cool side of the enclosure, and monitor digging behavior and sand‑clump texture for adjustments.
- Maintain humidity at 30‑50 %, keep substrate firm but not soggy, and sanitize the box after egg‑laying with reptile‑safe disinfectant before fully drying and re‑packing.
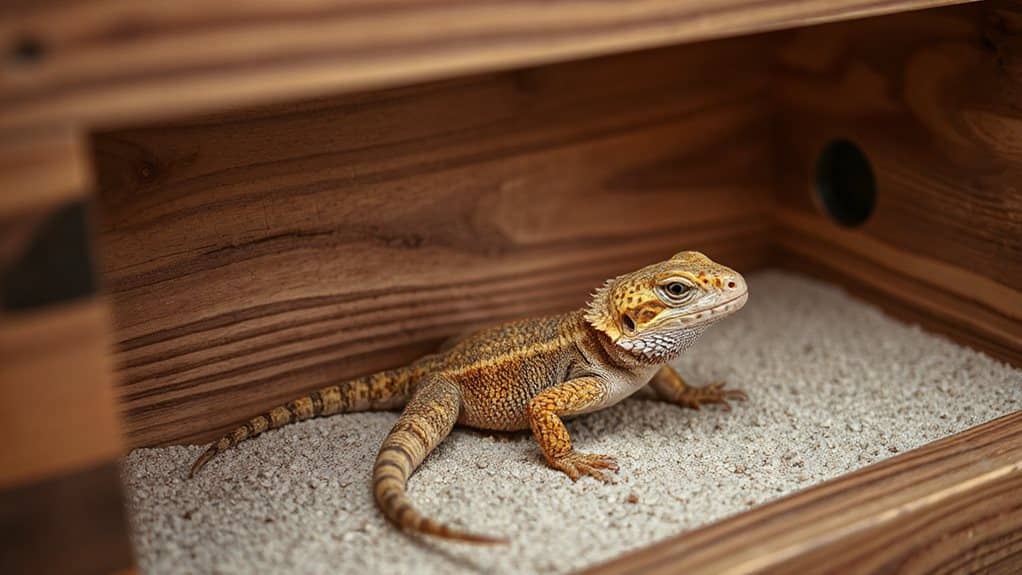
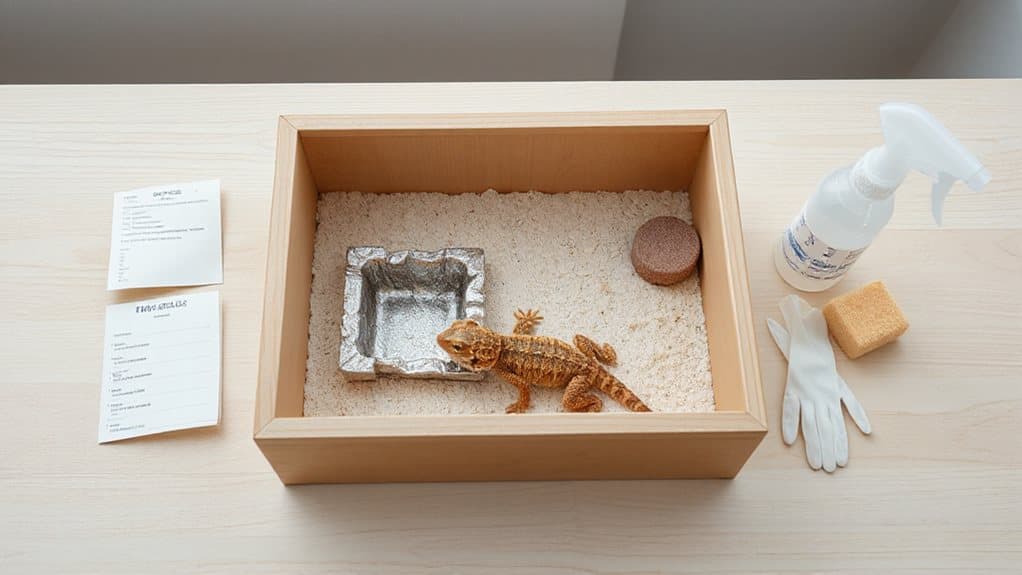
Choose the Right Size and Material for a Dragon Lay Box
When you’re picking a lay box, think of it like choosing the perfect campsite for a road‑trip trip—size matters, and the right gear makes everything smoother. Choose at least a 12‑gallon plastic tote for a tiny dragon, 18‑gallon for medium, and 20‑gallon or larger for adults, ensuring it’s tall enough for a 4‑6‑inch sand depth. Prefer sturdy Rubbermaid totes, avoid calci‑sand, and keep the entry low for easy access. Digging is a natural behavior for bearded dragons, so providing a dig box helps satisfy their instinctual need to burrow. Regular maintenance and checking battery‑powered devices nearby can prevent unexpected issues like a low battery alert on smart home locks.
Cut and Shape the Box to Create a Snug Entry Hole
Snip, cut, and shape that tote like you’re carving a tiny campsite for your dragon—because a snug entry hole is the difference between a smooth trek and a chaotic scramble.
Grab heavy‑duty scissors or a drill bit just a bit larger than your dragon’s widest girth, then smooth the edges with a soldering iron, round the rim, and place it on the cool side so substrate stays in while your pet ventures. Plant aromatic herbs nearby to help deter pests with their bold scents and attract pollinators like bees and lacewings for garden balance, especially when you use rosemary and mint as part of your planting.
Pick a Substrate That Mimics Natural Burrowing Conditions
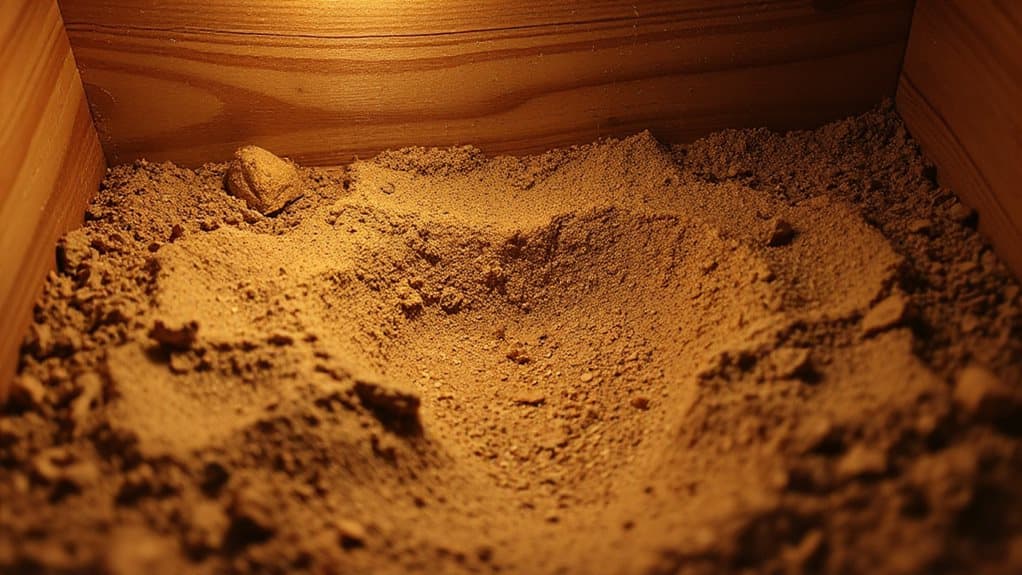
Now that the entry hole’s snug and ready for your dragon’s grand trek, let’s talk about what’s under its feet—because a good substrate is like the perfect campsite floor, giving your reptile a place to dig, hide, and feel right at home.
Mix play sand, organic topsoil, and excavator clay 1‑1‑1 for a natural, burrow‑friendly base; sift sand, avoid manure, and keep layers deep enough for tunnels, yet safe for younger dragons. Deep‑rooted plants like daikon radishes break up compacted soil and inspire similar tunneling behavior in well‑structured substrates.
Prepare the Substrate: Break, Moisten, and Level It Correctly
Even before you let your bearded dragon start its grand excavation, you’ve got to get the substrate into shape—think of it as packing your camping gear before hitting the trail, except the gear is coconut husk bricks, peat‑sand blends, and a bit of excavator clay.
Break bricks, crumble clay, blend peat and sand, then sprinkle warm water until it feels like a sandcastle, level it to 6‑8 inches, and smooth out pockets so your dragon can dig happily.
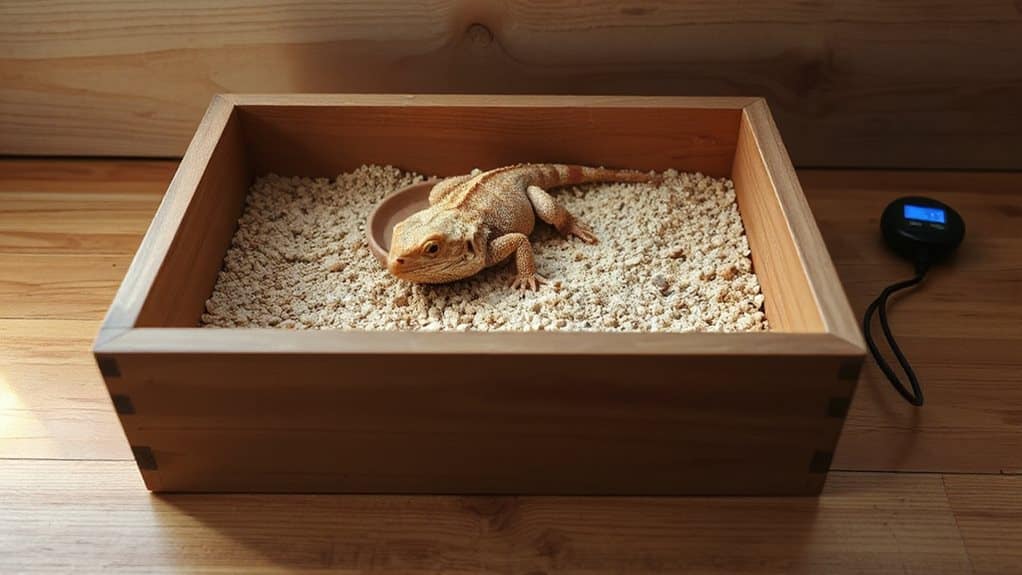
Heat the Dragon Lay Box and Keep the Substrate Warm
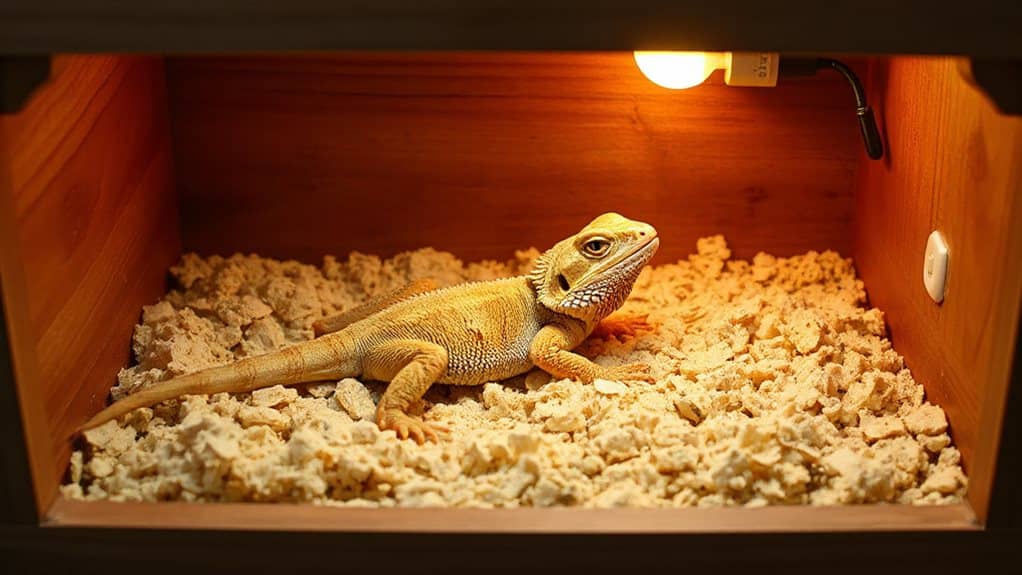
When you’re setting up the lay box, think of the heat mat as the campfire that keeps your dragon’s “tent” cozy—just don’t let it burn the whole campsite.
Choose a 7‑32 W mat, place it under an aluminum sheet and a slab of slate, then cover with insulated rofoam.
Hook a pulse‑proportional thermostat with a wall sensor, tape exposed wires, and monitor temperature regularly for safe, even warmth.
Prefer materials like stainless steel or powder‑coated surfaces for components that may contact moist substrate to reduce rust and prolong durability, especially around the heat source for consistent performance and safety by preventing corrosion on metal parts like powder-coated steel.
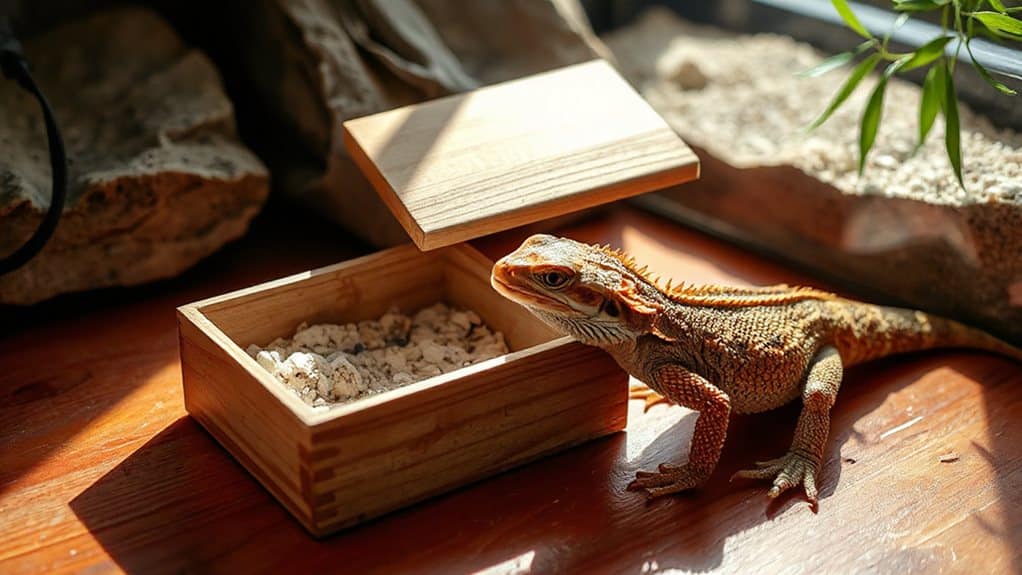
Add a Ramp or Burrow Insert to Your Dragon Lay Box for Easy Entry
After you’ve got the heat mat set up like a cozy campfire, the next step is giving your dragon a smooth way to climb into its tent—think of it as building a little trail up a hill for a weekend hike.
Cut a 4‑inch‑high tub edge, drill a snug 1‑2‑inch entry hole, attach a 20‑degree wooden ramp, seal with silicone, and line the base with packed coco husk so your scaly camper feels safe and adventurous.
Position the Dragon Lay Box Inside the Enclosure for Optimal Access
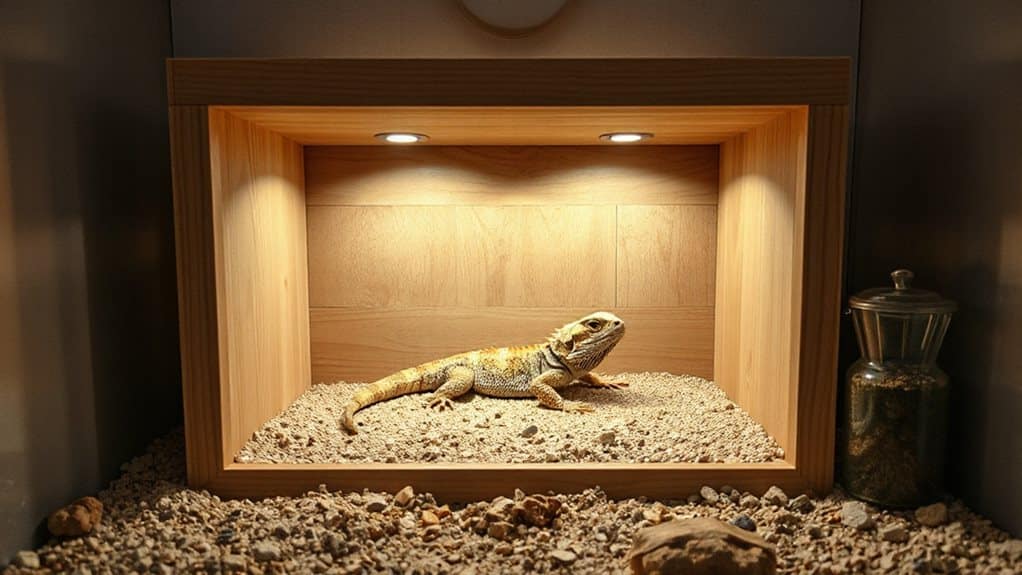
You’ll want to set the lay box on the cool side of the tank so your dragon can rest out while still being close enough to the main area for a quick dash, and if space is tight you can try a middle‑enclosure spot that still keeps the temperature gradient intact.
Have you ever watched a dragon sprint to a ramp and then disappear into a cozy burrow? Just place the box where the ramp leads straight in, keep the rim low enough for easy entry, and you’ll see her pop in and out like a tiny wanderer on a camping trip.
Many shade‑tolerant plants use CAM metabolism to conserve water and thrive with indirect light, a helpful reminder to avoid overwatering nearby enclosure plants.
Cool Side Placement
Imagine the tank as a mini‑campground, and the cool side of that campsite is where you’ll set up the lay box so your bearded dragon can “camp out” without getting baked.
Place it midway along the shadowed edge, away from the heat lamp, so the dragon enjoys natural thermoregulation.
Use a snug entry hole and a 2‑inch deep peat‑sand mix, keeping the box cool, comfy, and egg‑ready.
Mid‑Enclosure Access
Imagine the lay box tucked right in the middle of the tank, like a cozy campsite set up just a few steps away from the heat lamp, so your bearded dragon can wander in and out without feeling like it’s trekking across a desert.
You’ll cut the top, leaving a low‑profile rim, drill a snug base‑level entrance, and fill it with loose coconut coir, creating a stable, accessible burrow that feels safe, encourages digging, and keeps your dragon happy while you proudly serve its comfort.
Ease of Entry Ramp
Placing the lay box right inside the enclosure and adding a low‑profile ramp turns the whole setup into a mini adventure campsite for your bearded dragon, and it’s surprisingly easy to pull off.
You’ll glue carpet strips or lay a textured mat on the ramp, stick it into a 6‑8‑inch substrate mix, and align it with the enclosure lip so the dragon climbs like a tiny explorer, preventing spills and keeping the cool side tidy.
Monitor Digging Behavior and Introduce the Box When the Dragon Is Ready
If you start seeing your bearded dragon constantly pawing at the glass or frantically digging into the substrate, it’s a clear sign that it’s itching for a proper burrow, and that’s the perfect moment to bring in a lay box. Watch daily, log sessions over ten minutes, note if digging spikes before cooler temps, and place the box in a quiet corner; if he ignores it after two days, try a different spot.
Adjust Moisture and Texture as the Dragon Begins to Use the Box
You’ll notice the sand getting a little sticky as the dragon starts exploring, so add a splash of water—just enough to bind the grains without turning the box into a swamp, and keep an eye on how he paws around to see if the texture feels right.
If the substrate seems too dry, give it a quick mist and watch the humidity stay high inside the side‑hole‑sealed box, but remember to check the enclosure’s overall moisture so you don’t accidentally create a rainforest in his terrarium.
Try swapping in a bit of coconut husk or a sand‑soil mix if he’s digging too fast, and don’t forget to laugh when he makes a tiny mud‑pie—those little quirks are the best part of the whole “camping” quest!
Moisture Levels Guide
Ever wondered how to keep your bearded dragon’s nesting box feeling just right, like a cozy campsite that never gets too soggy or too dry?
Aim for 70‑80% humidity, use a digital hygrometer, mist lightly each day, and watch the substrate stay damp, not soggy;
check temperature, record changes, and adjust misting or ventilation if it feels too wet or too dry.
Texture Adjustment Tips
Since you’ve already set up the basic humidity, tweaking the texture is like fine‑tuning a campsite’s ground for a perfect night under the stars—mix 70 % play sand with 30 % organic topsoil, then add just enough water until the substrate holds together when you squeeze it, forming those little sand‑castle clumps that stick without turning into a soggy mess.
Pack it to ten inches, test clumps, and adjust water by a splash if it feels too dry, ensuring your dragon can dig comfortably while staying cozy.
Monitoring Dragon Behavior
Usually, the moment your bearded dragon starts digging and lounging in the new lay box, you’ll notice a whole chorus of clues that tell you whether the moisture and texture are spot‑on or need a tweak, so keep an eye on the little sand‑castle clumps, the frequency of those “glass‑surfing” sprints along the enclosure walls, and any sudden beard‑flaring that might scream, “Hey, this feels weird!”
—if the substrate stays firm but not soggy, the humidity hovers around 30‑50 % on your hygrometer, and the dragon’s skin stays supple, you’re probably golden, but a sighing sigh, a drooping beard, or a lazy, sun‑kenched pose?
that it’s time to mist a bit more, sprinkle extra sand, or swap in a fresh patch of sphagnum moss, all while you enjoy the mini‑adventure of fine‑tuning a reptile campsite—think of yourself as a campsite ranger, balancing comfort and excitement for your scaly camper.
Spot Egg‑Laying Signs and Handle the Eggs Safely
When your bearded dragon starts acting like a tiny adventurer on a camping trip, you’ve probably entered the egg‑laying phase, and discovering the clues early can make the whole process smoother for both of you. Watch for a swollen belly with marble‑like nodes, frantic pacing, and sudden digging spikes after day 20.
Gently palpate the bumps, note weight gain, and move the lay box to a quiet spot; if she refuses to lay after a few days, call the vet.
Clean and Maintain the Dragon Lay Box After Each Breeding Cycle
After each lay you’ll want to scrub the surface with a reptile‑safe disinfectant, because a clean box keeps your dragon happy and the eggs safe—think of it like washing your camping gear after a muddy trek.
You should swap out the sand or substrate every cycle, just as you’d replace a sleeping bag’s liner after a long hike, to prevent hidden bacteria from setting up camp.
Finally, give the bin a quick once‑over for cracks or worn spots; fixing any damage before the next excursion saves you from a surprise “leaky tent” situation.
Sanitize Surface After Egg‑Laying
Even though the eggs are safely tucked away, the real trip begins once they hatch—because now you’ve got to turn that lay box into a spotless, dragon‑friendly zone before the next breeding cycle.
Wash your hands, wipe every interior surface with a reptile‑safe disinfectant, scrub away any debris, squeeze out excess moisture, then let it air‑dry completely, checking for cracks before you store it for the next expedition.
Replace Substrate Regularly
Usually you’ll want to swap out the lay‑box substrate at least once a month, especially if your bearded dragon’s been busy digging, munching, and leaving little “souvenirs” behind; this keeps the box smelling fresh, prevents nasty bacteria, and makes the next breeding cycle feel like a brand‑new campsite.
Spot‑clean after each feeding, toss paper bedding quickly, and give cypress or coir a longer stretch—just watch for smells or soggy spots, then replace fully when it starts to look or smell “camp‑gone‑stale.”
Inspect and Repair Damage
Kick off each post‑breeding cleanup by giving your dragon’s lay box a once‑over that feels more like a campsite inspection than a chore—imagine you’re checking a tiny, scaly‑filled caravan for any dents, cracks, or loose handles before the next expedition begins, because a sturdy, smell‑free box means a happy, healthy mom and a smoother breeding cycle, right?
You’ll scrub walls with reptile‑safe disinfectant, rinse with lukewarm dechlorinated water, dry fully, then spot‑repair cracks using food‑grade silicone, sand sharp edges, and test stability before storing the box in a dry, labeled spot.
Troubleshoot Common Problems: Soggy Substrate, Refusal to Dig, and Overheating
When you first set up a lay box, you’ll quickly find out that getting the sand just right is a bit like packing for a camping trip—too much water and the whole campsite turns into a swamp, too little and you’re left with a dusty desert that no dragon wants to dig into.
Keep sand damp but not soggy, make sure 9‑12 inches depth, place box in a cool spot, and check temperature before letting her in; if she still refuses, consider health issues and call a vet.
And Finally
You’ve got everything you need to build a cozy, dragon‑friendly lay box, so why not jump in and watch your bearded buddy dig, warm, and maybe even hatch some eggs? Remember, the right size, substrate, and heat make all the difference—think of it as setting up a tiny campsite for your reptile. Keep an eye on moisture, tweak the texture, and don’t panic if it’s a little soggy at first; a quick dry‑out and you’re back on track. Happy digging, and enjoy the wild journey of reptile parenting!