How to Test if an Electrical Outlet Has Power
Slip on insulated gloves, grab your multimeter, and double‑check the breaker’s off, then set the meter to AC 200 V, plug the black lead into COM and the red into VΩ, and pop the probes into the narrow hot slot and the wide neutral slot—if you see a solid 110‑120 V reading, the outlet’s alive and ready for your camping gadgets, and a quick hot‑to‑ground check confirms the ground’s solid, so you’re good to go; keep reading for more tips!
TLDR
- Turn off the breaker, wear insulated gloves, and inspect your tester for damage before use.
- Verify the tester on a known live outlet to confirm it works.
- Set a multimeter to AC voltage (200 V range) and measure between the narrow hot slot and the wider neutral slot; expect ~110‑120 V.
- Double‑check by measuring hot‑to‑ground; a similar reading confirms proper grounding.
- If readings are absent or erratic, reset the breaker, check for tripped switches, and call a professional if the issue persists.
Must‑Have Safety Gear for an Outlet Voltage Test

Ever wondered why you need a full‑gear “adventure kit” before you start poking around an outlet? You grab insulated gloves, safety glasses, and arc‑rated clothing—think of them as your superhero cape for 120‑volt missions.
Add insulated tools, a certified voltage tester with the right CAT rating, and a non‑contact detector, then you’re ready to protect yourself while helping others stay safe. Arc‑flash risk must be assessed before any work. Boundary trees can create shared liability concerns when working near property lines.
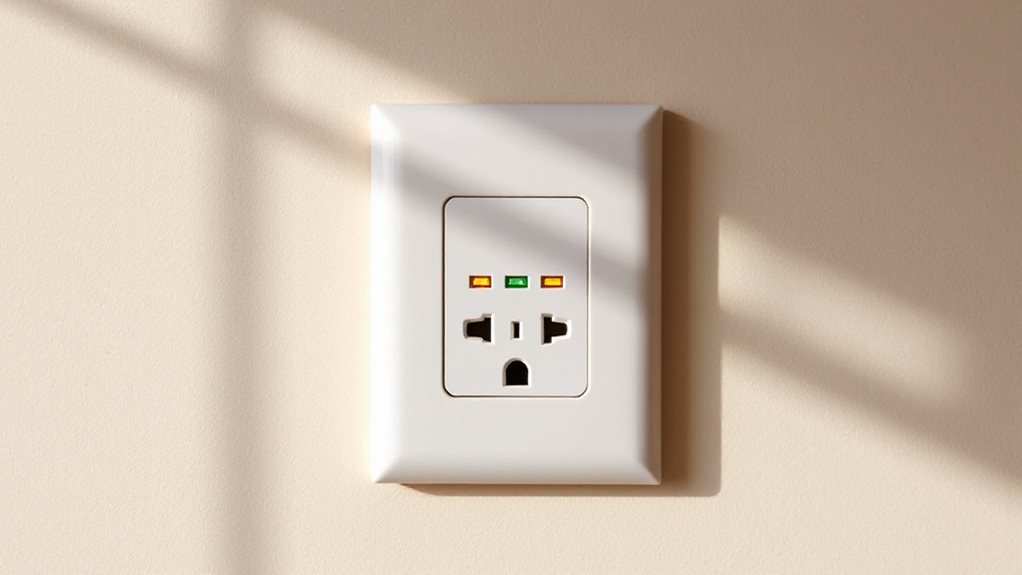
How to Identify Hot, Neutral, and Ground Slots for an Outlet Voltage Test
When you plug in a tester, the narrow slot is the hot side that your wire’s black or red wire will hit, so make sure you’re looking at that skinny opening first, because it’s the one that carries the 120‑volt punch; the wide slot opposite it’s the neutral, matching the white or gray wire that safely returns the current, and you’ll notice the larger, round hole at the bottom is the ground, where the bare copper or green wire connects for safety—so check the gold‑colored screw for hot, the silver for neutral, and the green for ground, and you’ll have the outlet mapped out faster than you can set up a campsite tent! Regular core aeration improves soil health and reduces clover establishment by increasing soil porosity and root depth.
Hot Slot Identification
So, how do you spot the hot slot on a wall outlet without turning your kitchen into a science lab? You look for the narrower vertical slit—it’s the hot side, while the wider one is neutral and the U‑shaped slot is ground. Plug a multimeter, set it to AC, touch the black probe to ground, the red to the narrow slot, and you should see about 120 V. If the beep from a non‑contact tester gets louder near that slot, you’ve nailed it, perfect for campsite gear checks!
Neutral Slot Recognition
If you’ve ever wondered why the taller slot on a wall outlet feels like the “good guy” in a campsite power‑check, it’s because that height difference is a deliberate visual cue that the slot is the neutral connection, while the shorter slot is hot and the round hole is ground.
You can confirm neutral by touching a multimeter’s probe to the taller slot, listening for the beep, and noting that the white or gray wire leads there, ensuring safe, reliable testing for anyone you help.
Ground Slot Confirmation
Ever wondered which slot on a wall outlet is the “safety net” that keeps your campsite gadgets from frying? The U‑shaped ground slot connects to the green wire, and you’ll see a round plug hole.
Place the black multimeter probe on that slot, the red on the narrow hot slot, and you should read about 120 V, confirming a proper ground path for safe, trouble‑free camping journeys.
Setting Up Your Multimeter for an AC Voltage Test
Ever wondered how to turn a simple multimeter into your trusty campsite power‑check sidekick?
First, flip the dial to AC voltage—look for the squiggly ~ symbol and the V label.
Set the range to 200 V (or 120‑240 V) so you’re covered.
Plug the black lead into COM, the red into VΩ, then power on, double‑check the meter’s mains rating, and you’re ready to test outlets safely.
Note that daytime noise ordinances can make generator or appliance testing disruptive, so be mindful of local decibel limits when testing power outdoors.
Performing the Hot‑to‑Neutral Voltage Check
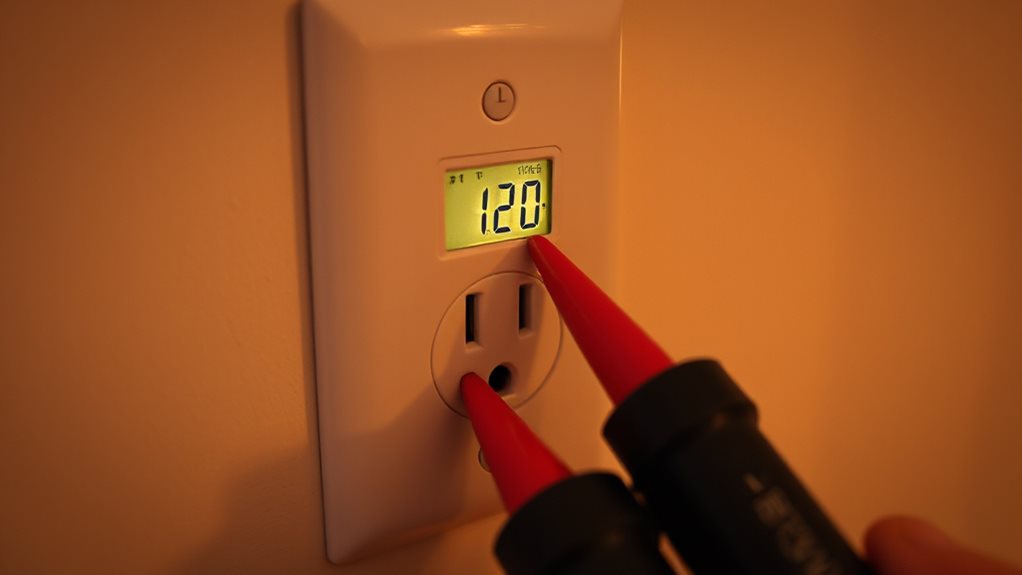
Ready to see if that campsite outlet’s actually alive?
Plug the black probe into the larger neutral slot, the red into the hot slot, set the meter to AC volts, then watch the display.
You should see roughly 115‑125 V, ideally around 118 V, confirming the outlet’s power.
If it’s lower, note a possible neutral issue and investigate further.
Proper care of appliances like air fryers—such as avoiding overheating and ensuring vents aren’t blocked—helps prevent electrical problems and prolongs their lifespan, so consider maintenance if you notice reduced performance.
Verifying Ground Integrity With a Multimeter
After you’ve confirmed the outlet’s hot‑to‑neutral voltage, the next step is to make sure the ground is actually doing its job, because a dead ground is like a missing safety net on a camping hike— you’d rather not find out the hard way.
Set the meter to AC, touch the red probe to hot, black to ground; ~120 V means good ground, zero means broken.
Then switch to continuity, beep‑check hot‑to‑ground; no beep signals a problem.
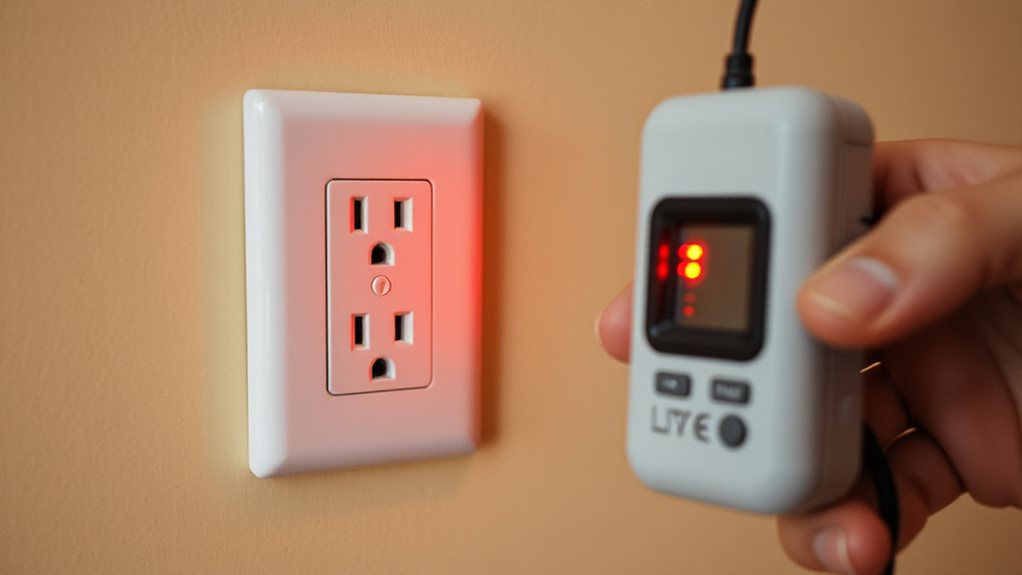
Using a Plug‑In Outlet Tester for Quick Fault Detection
So, you’ve got a plug‑in outlet tester in hand—think of it as the Swiss‑army knife of electrical diagnostics, ready to flash you a quick “all‑clear” or a neon‑bright warning when something’s off.
You simply plug it, watch the LED dance, and instantly spot open grounds, reversed hot/neutral or GFCI failures, while the beeper chirps if a breaker trips, making your troubleshooting fast, reliable, and almost as fun as a campsite night‑light.
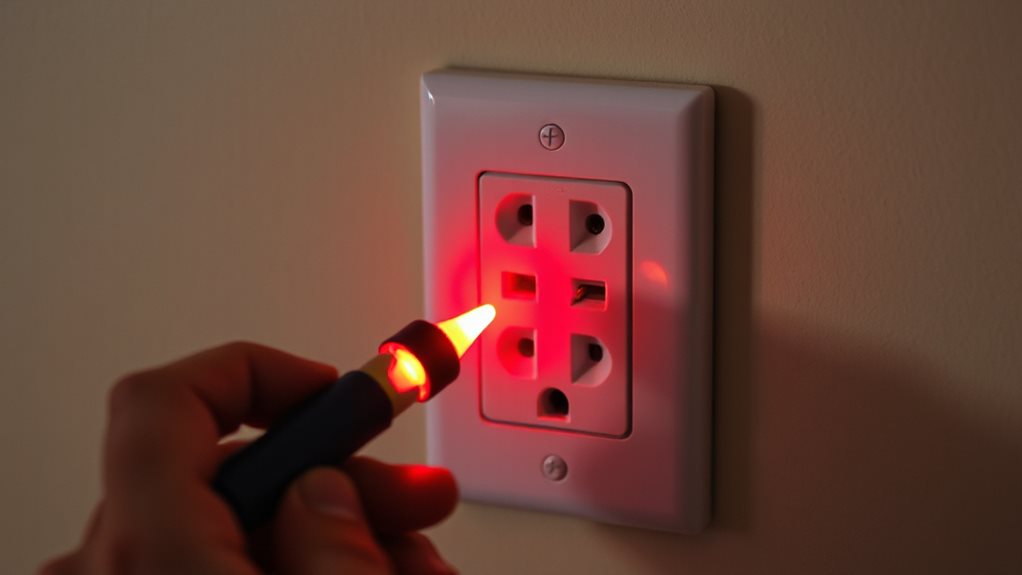
Spot‑Checking With a Non‑Contact Voltage Detector
When you swing a non‑contact voltage detector over an outlet, you’ll see a bright red tip or hear a chirp if the circuit’s alive, and that instant visual cue tells you exactly which slots are hot, so you can avoid the dreaded “no‑power” surprise later.
Have you ever wondered why the light flashes differently on a switched outlet versus a constantly powered one?
Remember to keep your hands dry, grab the tester by its insulated grip, and treat it like a trusty camp‑fire—check it on a known live source first, then let it guide you safely through each outlet you encounter.
Some detectors also feature side-view windows so you can monitor indicators without moving plants or fixtures.
Detecting Live Outlets
Ever wondered how you can tell if an outlet’s alive without pulling out a screwdriver or a multimeter? Grab your non‑contact detector, test it on a lit lamp first—watch the red tip flash and hear a chirp—then hover over the smaller slot, then the larger one, listening for beeps. If it lights, you’ve found a live outlet, perfect for helping friends on a camping trip.
Interpreting Light Indicators
You’ve already seen how a non‑contact detector can whisper “live” when you hover it over a lamp cord, so now let’s talk about what those flashing LEDs actually mean when you point the tester at an outlet.
A steady flash or rapid series tells you the electric field is coupling the sensor, confirming voltage; a beep pairs with the flash for double‑check, so you can confidently guide friends to safe, powered spots on your next camping excursion.
Safe Handling Practices
So, how do you make sure you’re not accidentally zapping yourself while you’re out scouting power outlets on a campsite? First, test your non‑contact detector on a known live source—maybe a lamp—so you’re confident it’s working, then sweep the insulated tip across each slot, listening for beeps and watching the red light, always keeping the wall switch on and the battery fresh.
What Those Outlet Voltage Numbers Really Mean
Ever wondered why you see “110 V,” “115 V,” and “120 V” scribbled on the same outlet label and still get your phone charger working?
You’re actually seeing the nominal 120 V range, which can swing from 108 V to 132 V, so 110–115 V are just normal dips; most homes sit between 114 V and 126 V, perfect for lamps, laptops, and camping gear.
Troubleshooting Low or No Voltage in an Outlet Test
What’s the first thing you should do when your outlet reads 0 V or barely any voltage? Check your breaker—look for a tripped switch, reset it, and retest; if it trips again, you’ve got an overload or short. Then verify the ground by measuring hot‑to‑ground; 0 V means a missing or faulty ground. Finally, swap probe polarity to spot reversed wiring, and test nearby outlets to see if the problem is isolated.
When to Call a Professional Electrician After a Failed Outlet Voltage Test
If the breaker trips over and over, you’ve got a serious fault that’s not just a loose plug, and you should call an electrician right away.
Notice any scorch marks, melted plastic, or a burnt smell? That’s a clear sign the wiring’s overheating and needs professional attention.
And if your multimeter shows wildly different voltages each time you test, it’s time to hand the job over to a pro before you end up with a shocking surprise.
Repeated Tripping
So you’ve unplugged every gadget, hit the reset button, and the breaker still flips faster than a pop‑up tent in a windstorm—what’s really going on? If it trips after each reset, even with no load, you’re likely facing a hidden short, a faulty breaker, or damaged wiring.
When basic checks don’t pinpoint the source, call a licensed electrician—don’t gamble with fire or outages.
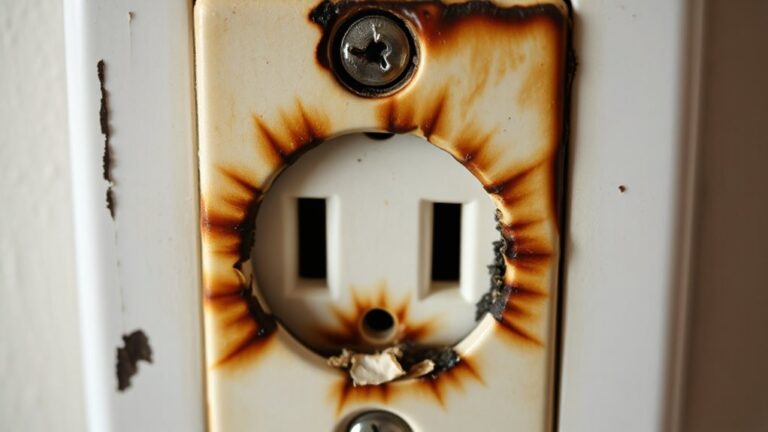
Visible Burning or Damage
Ever walked into a room, plugged in your charger, and noticed the outlet looking a little… crispy, like a marshmallow left too long over a campfire?
If you see dark scorch marks, warped plates, or smell something burning, shut it off right away, stop using it, and call an electrician; those signs mean overheating, arcing, or serious wiring faults that only a pro should handle.
Inconsistent Voltage Readings
Ever wondered why your multimeter sometimes shows 25 V one second, then jumps to 115 V the next, as if the outlet were playing a game of electrical hide‑and‑seek?
Those flickering numbers usually mean loose connections, bad probe contact, or wiring errors, and you shouldn’t gamble—if readings stay below 110 V, neutral‑ground reads zero under load, or voltage won’t stabilize after testing multiple spots, call a licensed electrician right away.
Quick Recap of Safe, Accurate Outlet Voltage Testing
Ever wondered why a quick, safe voltage check feels like a mini‑adventure before you set up camp? You turn off the breaker, slip on insulated gloves, inspect your tester for cracks, then verify it on a known live outlet—light, beep, bingo!
Insert probes one hand, read 110‑120 V between hot and neutral, double‑check hot‑ground, and celebrate a successful, safe power scan.
Overall
Now you’ve got the gear, the know‑how, and the meter set, testing an outlet’s power is as easy as checking a campsite’s water pressure—just plug, read, and compare, and if the numbers look off, don’t panic, double‑check your connections, and remember that a tripped breaker or a loose wire can be the culprit; if you’re still stuck, it’s time to call a pro, because safe electricity is as essential as a good night’s sleep under the stars.